When it comes to cooking a venison backstrap, I rely primarily on my 30-year-old, no-frills gas grill. Check out my article, “7 Steps for Grilling the Perfect Venison Steak,” where I go into great detail explaining how I achieve mouth-watering rare to medium-rare venison steaks on my grill.
There are times, however, when grilling outside is a hassle due to weather or other factors, such as running out of propane for a gas grill. Recently I’ve experimented with cooking venison backstraps in my oven, using the broiler option specifically, and the results have been outstanding.
I love the simplicity of this method, and there’s zero mess. Every oven is different, so you’ll need to experiment to find the best result in your kitchen, but here’s what works best for me.
13 Steps to Success
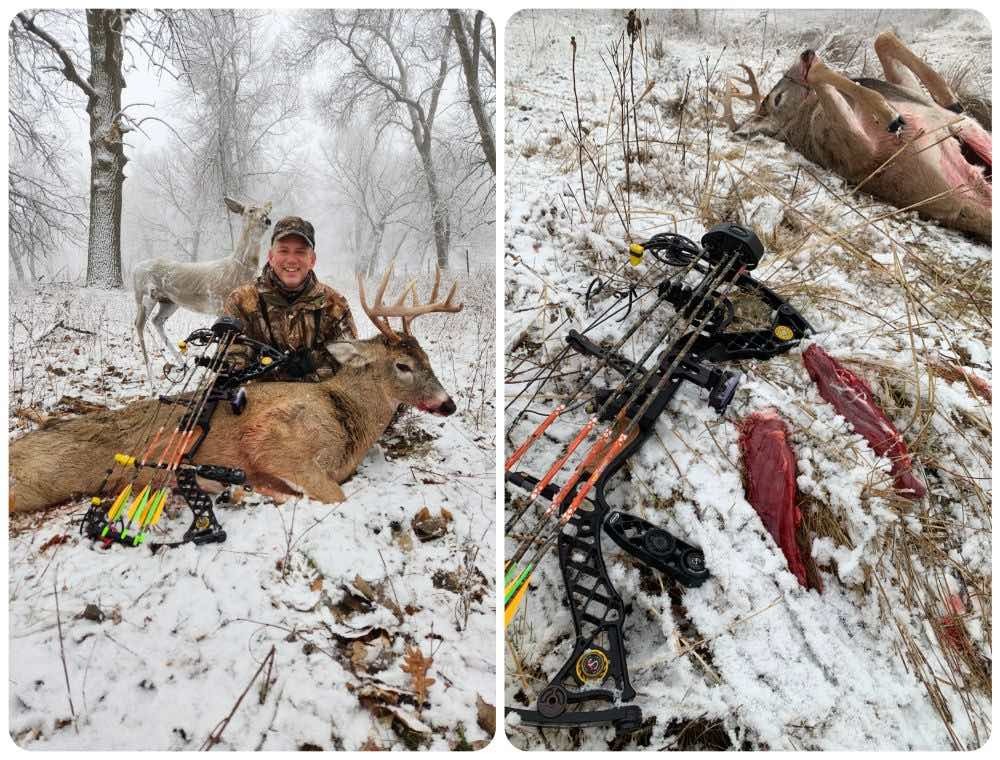
1: Start by leaving backstraps in large sections at the time of butchering; don’t cut them into 1- to 2-inch steaks. I cut backstraps into lengths of 9 to 10 inches, and then wrap them in plastic wrap, then in freezer paper. I’ve had no problem storing these large backstrap sections in my freezer for a year, and they’ve maintained great flavor (zero freezer burn).

2: When I plan to cook a backstrap for supper, on the grill or in the oven, I plan ahead and pull it from the freezer the night before and place it on a dinner plate to slowly thaw in my refrigerator.
3: About an hour before eating, I remove the backstrap from the refrigerator, unwrap it, and spend a few minutes with a sharp fillet knife to trim any silver skin and fat from the meat. Unlike beef fat, which adds flavor to a beef steak, you want to trim away any deer fat.
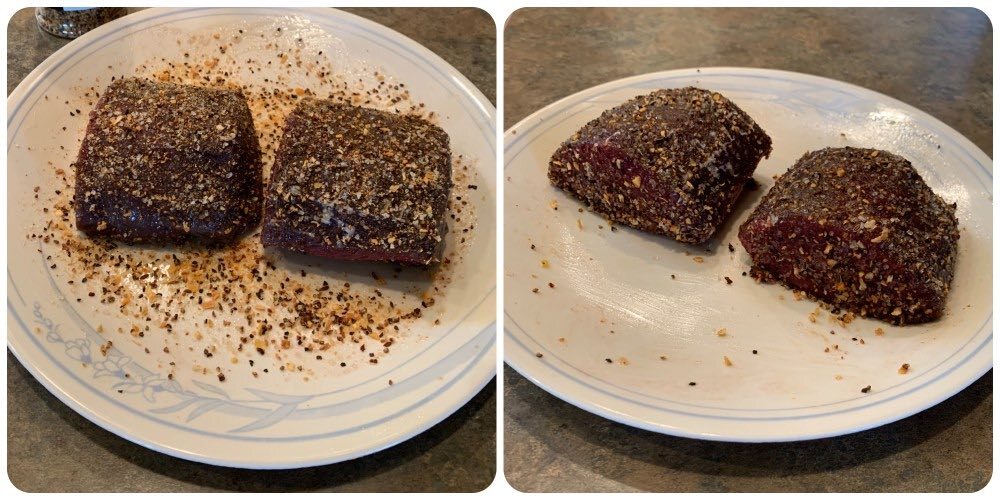
4: I pour a small amount of avocado oil onto the dinner plate. I cut the 10-inch backstrap in half, then rotate the 5-inch steaks around in the oil, covering them on all sides. You can soak up excess oil from the plate with a paper towel.
5: I grab my favorite venison backstrap seasoning, McCormick Grill Mates Montreal Steak Seasoning, and liberally cover all sides of both steaks. The oil helps the seasoning stick to the steaks. I really don’t think you can use too much of the Montreal seasoning!
6: At this point, I begin prepping other items for the meal. I want the backstrap to warm for at least 30 minutes before I begin cooking them.
7: My oven has the broiler at the top. I place one rack in the middle of the oven, and a second rack higher, about 6 inches from the broiler.
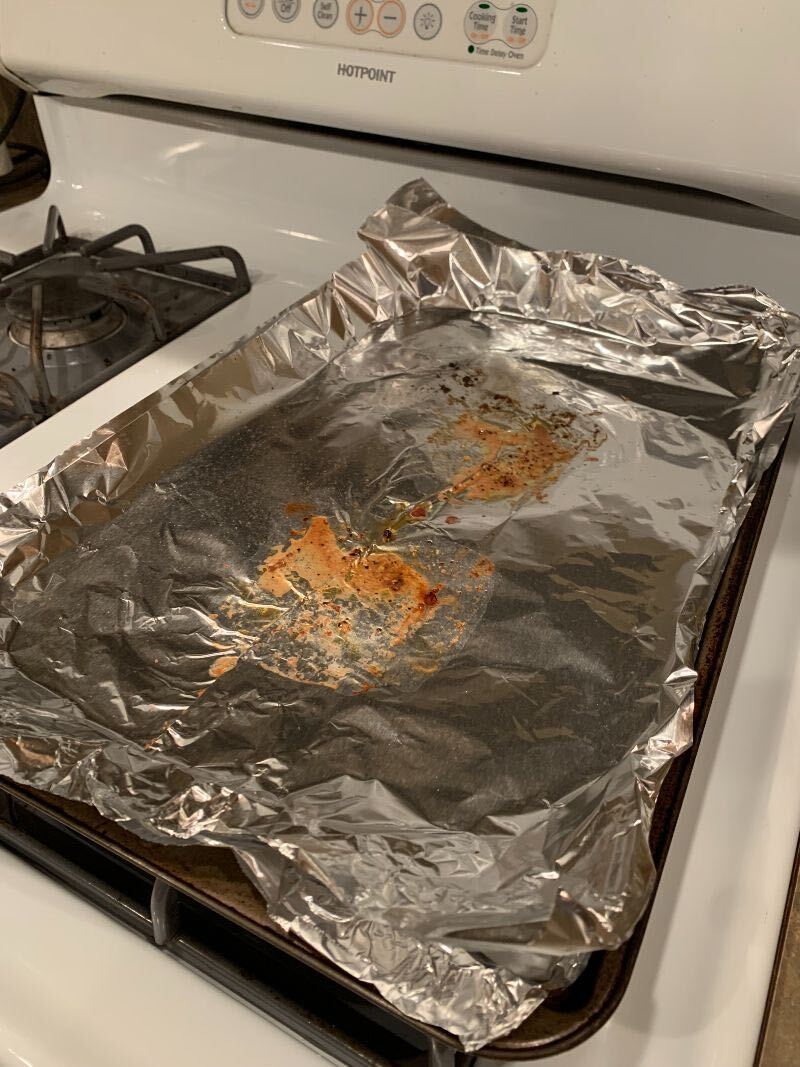
8: Using my oven, total cooking/resting time for rare to medium-rare steaks is 19 minutes, so I plan accordingly. When I’m ready to get rolling, I turn on the broiler, and set it on high. (My oven has a high/low option for broil.) As I wait a few minutes for the broiler to get hot, I place two sheets of aluminum foil on a shallow pan, then set the seasoned steaks on the foil.
9: Pay close attention here: After the broiler is hot, I place the pan on the middle rack (farthest from the broiler) and set a timer for 4 minutes. Because the steaks are so far from the broiler, the outside of the steak isn’t really cooking much, but the inside is getting warm and cooking slightly.
10: After 4 minutes, I quickly remove the pan, flip the steaks, and place the pan on the top oven rack, closer to the broiler. Again, set the timer for 4 minutes.
11: After 4 minutes, I quickly remove the pan, flip the steaks, and place the pan back on the top rack. Again, set the timer for 4 minutes.
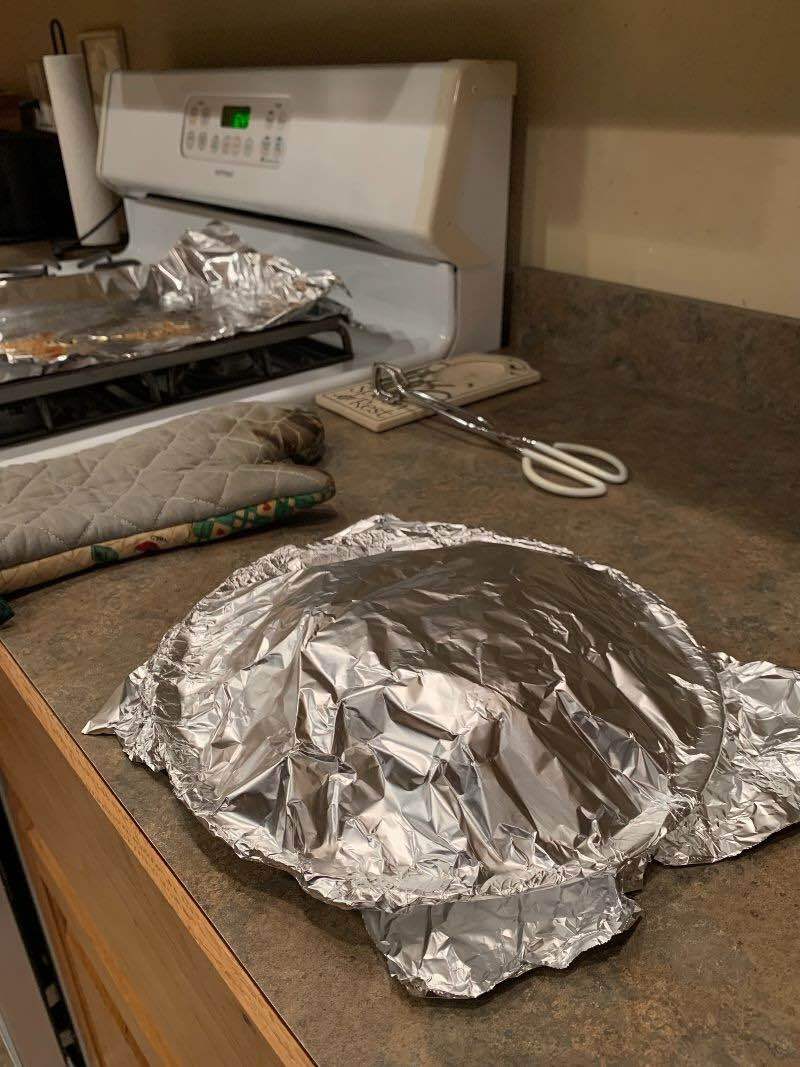
12: When the timer sounds, remove the pan and quickly place the steaks on a dinner plate (room temperature) and immediately cover the steaks tightly with aluminum foil. Set your timer for 7 minutes. This is called “resting a steak.”
If you cut into a steak immediately, almost all of the juices will rush out of it. Not good. Instead, be patient, and let it rest for 7 minutes. Don’t worry, the steaks will still be hot when you’re ready to eat because they’re covered. Resting the steaks in this manner allows the juices to settle throughout the entire steak. I don’t pretend to understand the physics behind this process, but I know it to be true. Note: Cutting into a steak to check whether it’s ready to be removed from the oven also results in this juice loss. Don’t do it! Finally, the steaks will continue to cook a bit during this resting period, too. Foodies call this “carryover cooking.”
13. Assuming you have everything else ready for the meal, and you’ve rested them for 7 minutes, now is the time to cut into the steaks to see the amazing results. Again, the steps I’ve shared are for rare to medium-rare steaks, so if you want them medium, you’ll have to adjust your cooking times accordingly. Example: I bet that in my oven, instead of cooking 4, 4 and 4 (middle rack, then high rack and high rack), I’d try 5, 5 and 5. Venison cooks fast and you don’t want to overcook it.
As you can see from the photo below, this cooking method results in zero mess. You don’t even have to wash the pan. Simply throw away the aluminum foil and you’re done.

Final Thoughts
Venison steaks cooked this way are tremendously tender, juicy and flavorful. The only reason I still prefer grilling over broiling is because with the former you get the wonderful sear marks on the steaks, as well as a crusted exterior. But living in Minnesota (think winter), I’ve learned that it’s nice to cook inside when the air temperature is single digits or colder, and opening the oven door after removing the steaks helps heat my house, too!