Many hunters who pursue big game would love to show off their prized buck, bull or bear, but they don’t have the money for a head-and-shoulder mount. After arrowing a mature buck in Kansas last fall and leaving the head with a local taxidermist for a European mount, I began researching options for displaying the skull/antler combo in my home. I finally decided on a product called Table Hooker.
About Table Hooker
The Table Hooker ($59.99) is designed to showcase small- to medium-sized skulls, which includes North America’s No. 1 game animal, the whitetail deer. As the name implies, the Table Hooker doesn’t mount to the wall. Instead, you attach a skull to the Table Hooker (no drilling of the skull required) and then place the finished display on a shelf or other flat surface. FYI: If you desire a wall-mount system, then check out the Skull Hooker, which is made by the same company.
When I looked at this product online, I liked the two finish options: Robust Brown and Graphite Black. But would they look as good in person as on my laptop? Also, the Table Hooker was described as adjusting easily up and down to provide a natural presentation of a trophy. Would it perform as advertised?
Assembly and In-Home Use
After unboxing the Table Hooker, I was pleased with the look of the powder-coated steel. I chose both a brown and black one because I couldn’t decide which color would be best with the dark-colored rack of my Kansas buck. Plus, I planned to give whichever one I didn’t use to my dad for Father’s Day.
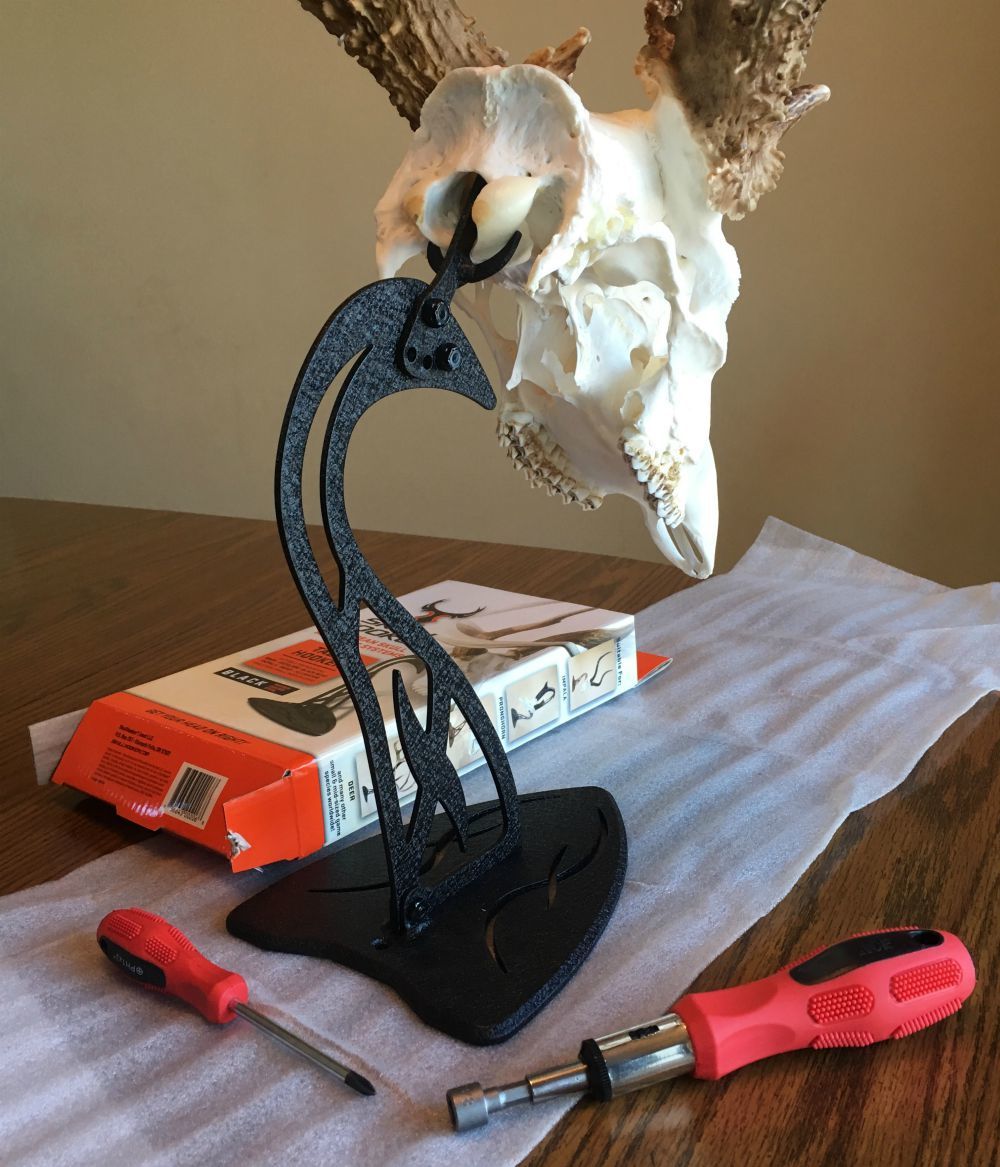
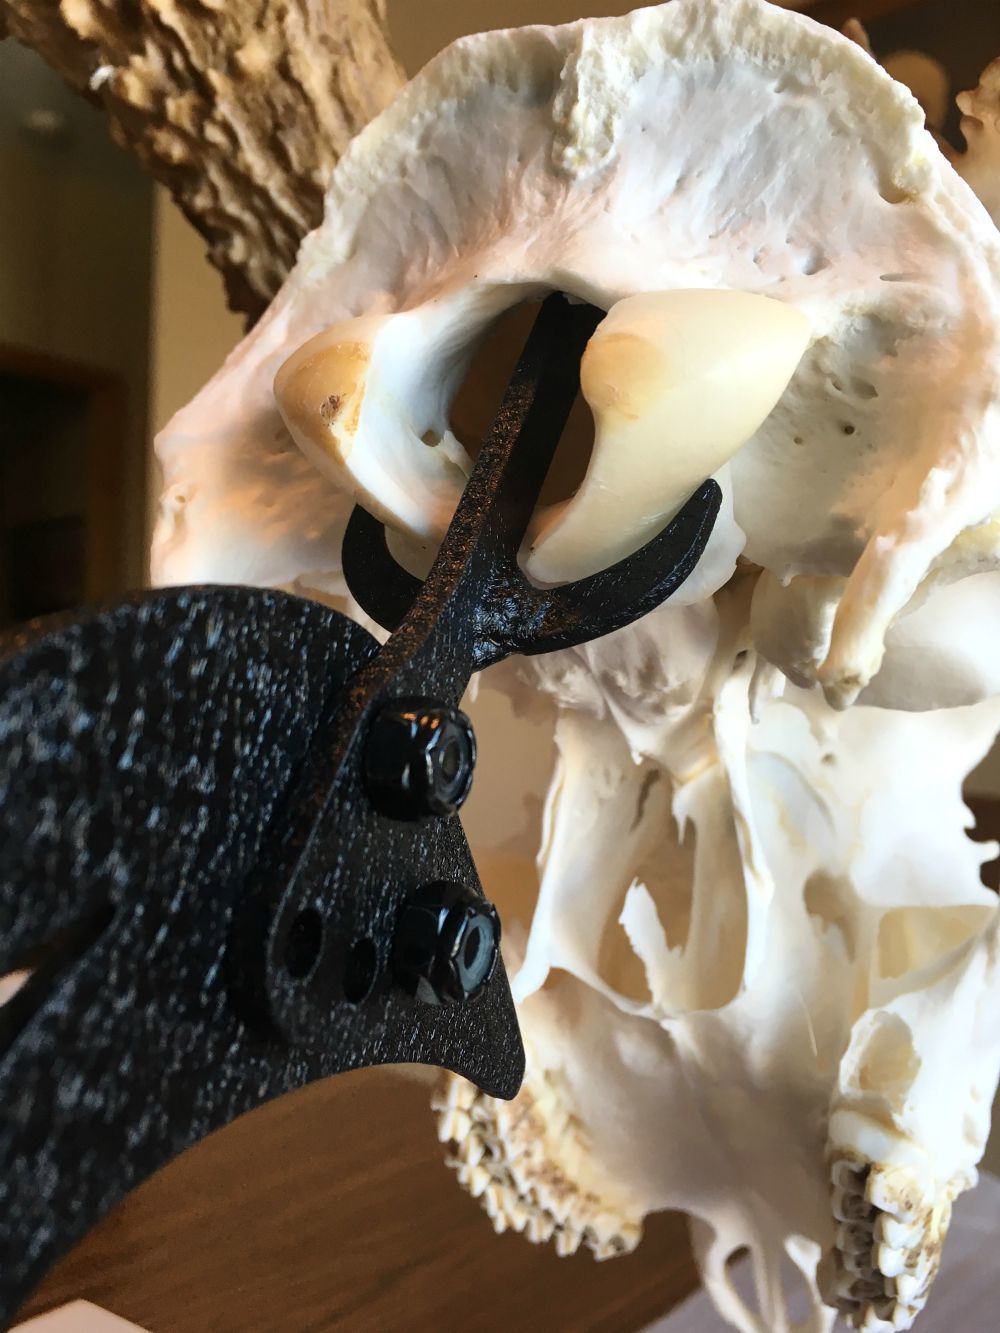
As the photos here show, there isn’t much to assembling a Table Hooker. A single screw and nut connects the vertical arm to the base, then two screws with nuts are used to connect the prong (the piece that goes into the skull) to the arm. A wood screw is also provided in case you want to secure the base to a shelf.

Placing a skull onto the Table Hooker isn’t difficult, but the first time you do it takes a minute or two — at least it does if you’re as careful as I am when it comes to handling European mounts. You see, in the past, I’ve had skull mounts damaged during shipping to my home, and I know firsthand that the skulls, especially the nose portions, can be fragile. So, the last thing I wanted was for the entire skull/antler/display to tip over during assembly and testing. Call me overly cautious if you like, but I wasn’t taking any chances.
Every skull and antler/horn combo is different, so it takes a bit of experimenting to find the right prong angle for your animal. The angle is controlled by how you mount the prong to the arm (again, two screws and two nuts). The first time I tried it, I had the prong set in the middle of the available prong-mounting holes. This is placement shown in the photo on the front of the product packaging. After carefully slipping the prong into the skull cavity of my Kansas buck, I could tell immediately that this setting wouldn’t work. The skull was leaning too far back. I could carefully let go of the trophy and it wouldn’t topple (Table Hooker weighs 3 pounds), but it was clear that I needed the rack to point a bit more downward, nose toward the floor, for a more secure system.
I removed the skull/antler combo and then reattached the prong to the arm using a hole that provided a bit more downward angle. Tip: While there are five holes available in the arm, and three in the bottom of the prong, you can mix and match the hole combinations between both pieces to achieve a dozen different angles. This ensures you can find the best possible angle for your skull mount. Making sure that the two nuts were tight but not too tight, I gently slipped the prong into the deer skull and tested it for balance.
One note about securing the skull to the prong: When you watch the experts from Skull Hooker demonstrate the process on YouTube, it looks easy. And it is. For me, however, it took more time simply because it was my first attempt at the process, and trust was an issue. Would the prong slip out of the skull? Did I have the prong seated in the skull in exactly the right place?
Two Months With Table Hooker
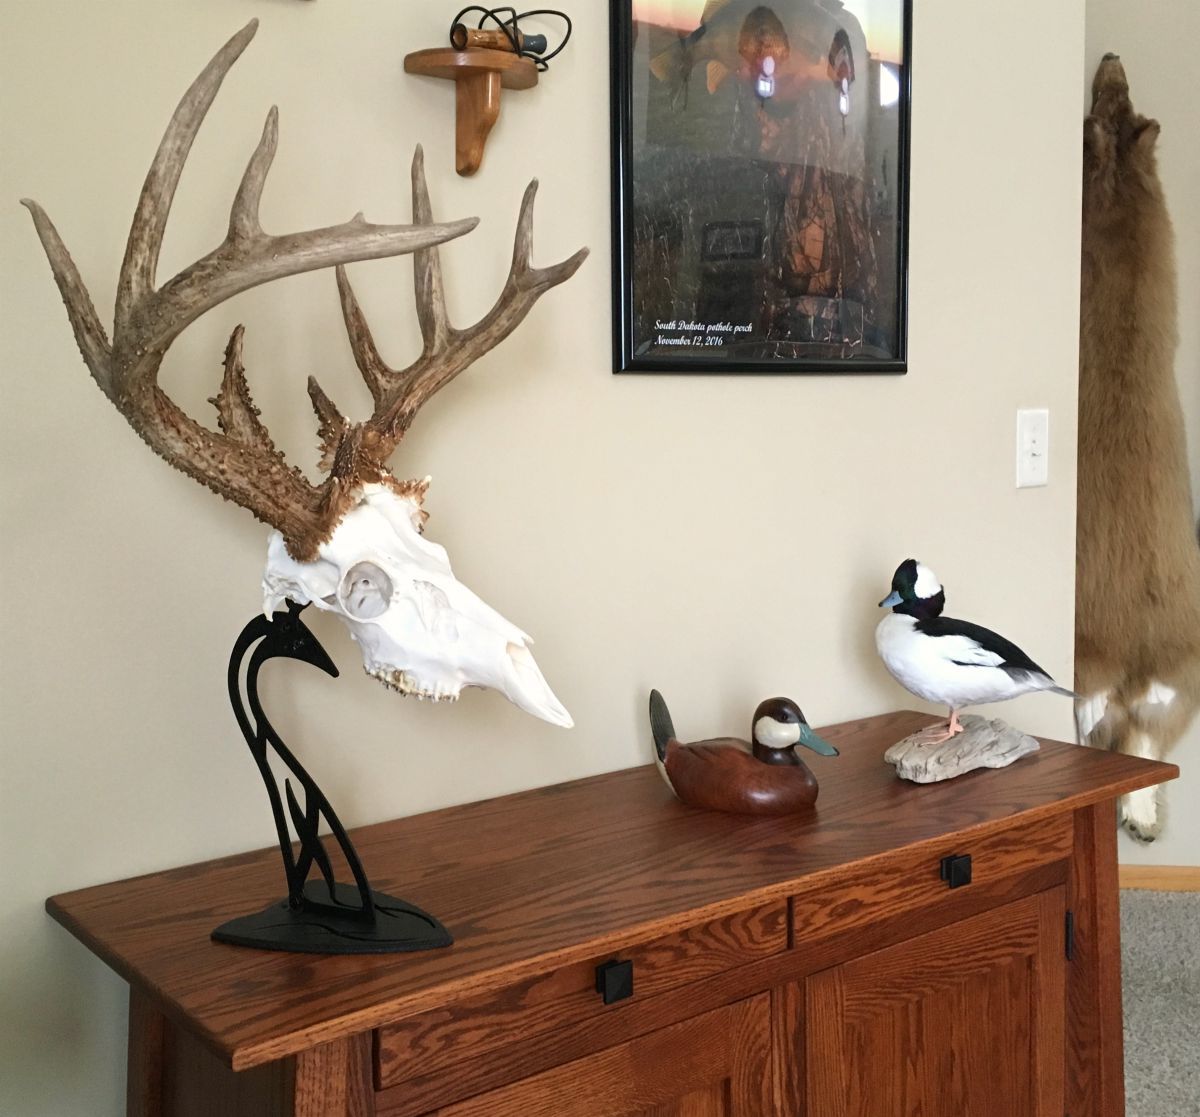
As I write this review, the Table Hooker has been in place on top of my gun cabinet for two months. I’ve been in and out of the gun cabinet several times, and the European mount hasn’t moved. There’s also a fair amount of foot traffic in that room, and it’s not like our family is walking on egg shells because we’re afraid we’ll knock over the mount.
Of course, you need to remember that the skull is simply resting on the prong, and the entire system isn’t anchored to any surface (unless you do so with the included wood screw). If you have infants crawling around at home and learning to walk by grabbing tabletops, or curious youngsters running about, I wouldn’t recommend placing a trophy skull on a Table Hooker and then setting it on a coffee table. In this scenario, you’re better off keeping the European mount out of their reach by securing it to the wall with a product like the Skull Hooker.
As you can see in the pic below, I chose the black-colored version. I liked the contrast it provided when sitting on a natural oak surface.
Final Thoughts
I wouldn’t change anything about the product’s design. My only suggestion is for the manufacturer to produce a simple, 90-second video demonstrating the dozen available mounting angles for the prong, with suggestions on where to start for average-size whitetail skulls and racks. A video clip showing the stability of the Table Hooker system would be welcomed, too.
In my opinion, Table Hooker is easy to use. When compared to larger wood bases, the sleek metal system showcases an animal in a clean and contemporary manner.
For more information, visit www.skullhooker.com.