Every bowhunting shot is different. In my experience, some of these moments of truth are completely nerve-racking and filled with adrenaline, while others are more emotionally manageable. If that’s the case, buck fever is less debilitating and the archer can generally perform up to expectation.
But when excitement and adrenaline become extreme, it can disrupt your ability to make a killing shot — putting you in a precarious position. In these situations, only your skill level and subconscious training can save you from potentially ruining the shot. This is why improving your shooting ability and control under pressure are crucial as a bowhunter.
Here are several steps you can take to maximize your shooting accuracy — so you can be deadly, even in those high-adrenaline bowhunting encounters.
Focus On Repeatability
Shooting the same way every time should be your No. 1 goal as a hunting archer. The problem is, we are human. Our conscious mind wants to take over, rather than leaving our subconscious mind to do what it was trained to do — to handle all the subtleties of the shot, which were learned through repetitive training while we just aim and focus on where we want the arrow to go.
The best way to establish increased trust in your shooting ability — to keep the conscious mind at ease and prevent it from taking over — is to practice consistent shooting technique, day after day, and week after week.
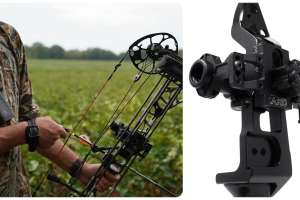
There are two ways to lay the right foundation: use consistent shooting form, and start accuracy-equipping your bow. Here are some tips and suggestions to help achieve both of these goals.

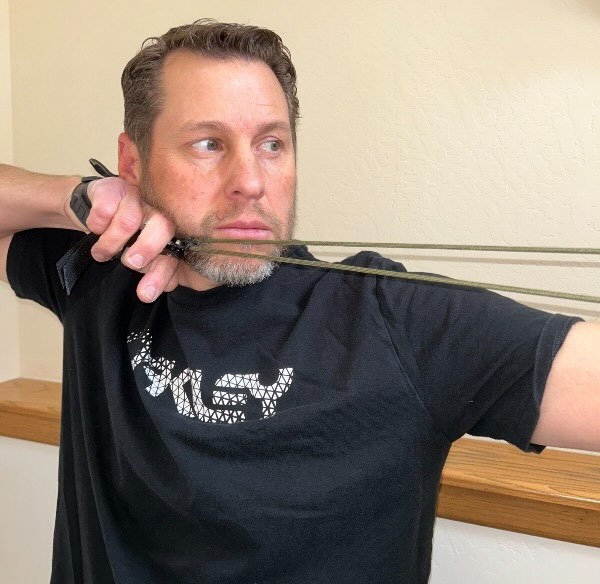
Good Shooting Form: Strive to use proper “T-form,” which places the body in the most relaxed state, improving consistency. T-form will give you a solid stance, with your feet shoulder width apart, while your torso follows a straight line from the waist all the way up through the neck and head. The torso and head/neck are positioned directly beneath your hips and legs — nothing is leaning forward or backward.
At full draw, the arms should resemble the top portion of the “T.” This means the top of the bow hand is in line with the archer’s shoulders all the way through the bottom of the elbow of the drawing arm. When the archer demonstrates this type of posture, you can draw an imaginary “T” across the body parts while looking at the archer’s body from either the front or backside.
This type of shooting form greatly minimizes the use of the body’s muscles while holding and aiming the bow, so there’s less variability from shot to shot.
Accuracy-Equipping Your Bow: As you analyze your shooting posture, you’ll notice T-form is not possible without using the correct draw length. In most cases, archers use a draw length that is too long, causing them to lean back and/or slant their head rearward. This also results in an inconsistent anchor, where the bowstring is pressed hard into the face or nose, which causes errant shooting.
Keep adjusting your bow’s draw length until your bow-arm shoulder stays low and locked — instead of protruding upward. When you gently lift your hand to point at an object in the house or out in the yard, the shoulder is relaxed, low and locked. You should keep the shoulder in the same position when you shoot. Lastly, the drawing-arm elbow (when looked at from the rear) should be in line with the arrow — not to the left or right, but directly behind it or just slightly above it. This will give the shoulder blade room to pivot inward (toward the spine) as you aim and pull through the shot using your back or rhomboid muscles. These are the only muscles you should be flexing during the shooting process.
Bolstering Forgiveness
This is a multi-aspect topic. For example, bow tuning and clean arrow flight are essential for improving shooting forgiveness, as are using a high-quality arrow rest. But I’ll focus on three elements that are often underemphasized: your grip on the bow, the quality of the arrows you shoot, and how the bow holds and aims.

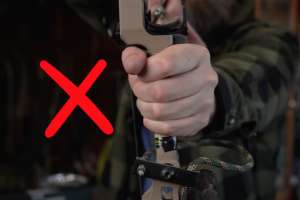
Your Grip: How you grip the bow will greatly influence your shooting consistency. To minimize hand torque, place the pressure point of the grip (or riser) just outside the lifeline and below the thumb-joint area on the palm. This is the only spot on your hand that lines up with the radius bone in your arm, which keeps it rock solid and consistent.
I like to “set my hand” on the bow’s grip just prior to drawing, by feeling for that non-collapsing sweet spot. Once the grip is set, I elevate the bow, tighten the tension on the bowstring, then pull smoothly to full draw. As I ease the sight pin on target, I remind myself to relax my arms, hand and fingers — pretending they are lifeless.
To make it easier to find the grip’s sweet spot, don’t hesitate to experiment with different grip designs or remove the supplied bow grip altogether. Small details matter a lot for refining accuracy.
Arrow Quality: Not all arrows are created equal — some come with poor weight, spine and straightness tolerances. With field points and close shooting distances, low-grade arrows go unnoticed. But once you screw in broadheads, accuracy will drop off dramatically, an aspect that will cause frustration and a loss in shooting confidence.
To avoid all this, buy top-tier arrows to ensure consistency from shaft to shaft. My favorite arrows have always been Easton’s aluminum/carbon arrows due to their relentless spine consistency, even when measured 360 degrees around the shaft. This type of uniformity is crucial for hair-splitting accuracy, particularly with fixed-blade broadheads. Great examples include the Easton X10 Parallel Pro Hunter, 5MM FMJ Match Grade, and FMJ Max arrows.
However, there are a plethora of all-carbon shafts that perform admirably as well, especially the “match grade” or “pro” offerings, which come with improved weight, straightness and spine tolerances. My favorites come from Carbon Express, Easton, Gold Tip, and Victory. My advice is to shop wisely for arrows. If you can get your hands on a spine-testing machine, then all the better, so you can measure straightness and spine averages. This will separate good arrows from low-grade offerings.
Bow Balance and Aiming: You can have the most sophisticated bow on the market, but if it aims awkwardly, you won’t shoot with much consistency. Instead, you’ll fight the sight pin as it wants to dip down, up or to one side of the center, causing added muscle movement and poor relaxation. Ideally, you want the sight pin to hold steady, with very little movement, as it rolls around the spot smoothly, moving equally up and down and from side to side.
To fix a poor-aiming bow, experiment with different stabilizer weights and backbar combinations until the bow balances and aims steadier. If you shoot with a quiver attached, be sure it hugs the riser closely. This will prevent the bow from tipping hard to one side. In my experience, the better the bow balances in your extended hand, without tipping forward, backward or to one side, the better it will aim and shoot.
Try this trick: draw the bow back, close your eyes, and then relax while anchoring. Then open your eyes and look at the sight’s bubble level. Is it in the middle or to one side? If it’s to one side, you’ll benefit by adding counterweight to the opposite side or by trying a back-bar setup and/or a low-profile quiver.
Evaluate Release Mechanics
If you tend to aim quickly, then mash the trigger on the release, you’re doing it the wrong way. A better way is to grip the release’s trigger lightly, then tighten your back muscles until the shot fires. Staying relaxed is crucial during this process to improve smoothness and consistency.
There’s no question that a wrist-strap, index-style release is supreme for bowhunting — it’s quick to handle and shoot, making it an excellent choice. Unfortunately, it’s also the easiest release on the market to punch, causing major shooting problems. To avoid all this, set up the release so it provides a more controlled shooting experience.
One key is to adjust the release so the trigger bites deep into the finger joint — stay away from the outer pad of the finger. You should be able to create a “hook” around the trigger peg using your finger; this places it somewhere between the first and second knuckle joint. Also, the release’s trigger should not emit a lot of creep or movement, a common feature on low-grade models, which causes distraction and anticipation just prior to the arrow firing. A semi-firm, crisp trigger is best for “pulling through the shot” using only your back muscles.
Here's how to do it: Draw back, anchor, and place the pin on the target — then acquire the trigger, forming a deep hook around it. Next, tighten your shoulder blades together until your arm/hand/finger unit moves steadily rearward. Within a few seconds, the release will fire by surprise. Practice the method over and over until your subconscious is used to waiting on the shot. In due time, the process will become automatic and natural, helping you shoot with more control.
If, for any reason, you find yourself still punching the trigger on occasion, I suggest switching to your middle finger to activate the release. It’s less sensitive, producing better results.
My friend PJ Selinski made the switch years ago and his bowhunting success has skyrocketed. With this method, PJ moves his middle finger to the trigger peg on his Carter Like Mike II release once it acquires anchor, curls it deeply, then slowly pulls through until the shot breaks.

Aim and Breathe Properly
Breathing plays a major role in how well you shoot. When I was writing my Technical Archery book years ago, I interviewed the best, most hard-core bowhunters I knew at the time. What did they have to say about breathing and shooting? Well, most of them suggested taking a deep breath during the draw, then letting out most of the air just prior to aiming and executing the shot. However, Darin Cooper, a talented engineer and archer, preferred to exhale air during the draw then to hold a full breath during the aim. So, go figure. Based on all this information, I suggest trying both ways to see what works best for you, and to do it the same way on every shot. I personally take a deep breath during the draw, then let out most of the air just prior to aiming and tightening my back muscles until the release fires.
Of course, you don’t want to get into the habit of aiming for too long either. If you do, your focus and form will quickly break down. Ideally, once you start aiming the shot should go in about 4 to 8 seconds. When practicing, if you begin holding beyond 8 seconds and you recognize your form deteriorating, let down so you don’t develop any bad habits. This is important.
Final Thoughts
Shooting a bow accurately in the face of adrenaline and buck fever is not an easy thing to do. But you can train yourself to get better at it. Try these tips to boost your shooting control and accuracy so you can be deadly when it counts most.