The first week of the season found me hunting the edges of the soybean field where I had glassed a group of bachelor bucks in late September. There were two good bucks in the bunch that any sane hunter would have shot, but I hadn’t seen either one all week. With only two days remaining, it was time to change tactics.
My brother, Mark, told me about a large block of timber that he had hunted the year before. He talked about a ridge top that was a quarter mile deep within the timber, and twice as far from the nearest road. There had been a bumper crop of acorns and Mark had seen a dozen or more deer that afternoon, including a big 10-point. Acorns were again plentiful, so I decided to check it out.
At the edge of the timber I discovered a rub line that led me across two ridges, and eventually to an oak flat that reeked with fresh sign. Big rubs and scrapes pocked the landscape, and several white oaks had dropped the mother lode of acorns. A half dozen honey locust trees grew in a small opening and were dropping pods like crazy. Big tracks and droppings were everywhere, which told me a fair number of does were hitting the smorgasbord, and it was a likely spot for a midday rendezvous with a big buck. I didn’t waste any time hanging a stand and settling in.
The first half hour several does meandered across the ridge, browsing for acorns and sucking up locust strips like a vacuum. A short time later two bucks emerged from the thick cover and started chasing a doe. I could have taken either one, but the thigh-size rubs told me there was something bigger stalking the neighborhood. That’s when I decided to try a little rattling and grunting.
It was shortly after the second sequence I heard a scuffling noise, then grunting on the opposite ridge. A couple minutes later I spotted movement, then white bone flickering in the sunlight. My jaw dropped when I brought the binoculars into focus. It was a heavy and wide 10-point with tall tines. The buck started to walk away, so I grunted a couple of times. Almost instantly he responded back with a deep grunt. I grunted again and followed up with two estrus bleats. Much to my surprise, the buck turned around and started walking in my direction. When the buck reached the dry creek bed, he started racking a tree. Eventually he worked around the tree and exposed his vitals. That’s when I let him have it with the .50-caliber Knight. At the sound of the shot, the buck folded and slid down the embankment and came to rest. To say I was excited would be an understatement. I couldn’t wait to lay my hands on the rack.
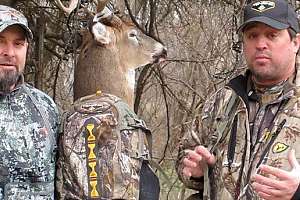
As I examined the buck more closely, it became obvious I’d killed an old warrior. Based on his gray face, sagging belly and worn teeth, I figured the buck was at least 8 ½ and possibly older. I couldn’t believe it — an hour after hanging the stand I had killed my biggest muzzle buck ever.
I wasn’t always so enthusiastic about hunting the early season, but after a half dozen bucks in equally as many years, I learned to like it. The turning point came when I realized the early season had more and bigger benefits than the late season. The biggest was having an opportunity to hunt bucks that hadn’t been pressured enough to totally disrupt their summer feeding and travel patterns. I also liked the fact that the season just happens to coincide with the pre-rut, a time when bucks are sparring for territorial rights and laying down scrapes, and they’re receptive to calls. Combine these facts and we have predictability and vulnerability working in our favor.
The early season might not be for everyone, but if you haven’t tried it, you’ll never know. Granted, there’s no guarantee you’ll shoot a big buck, but the following tactics are sure to tip the odds in your favor.
Post-Season Scouting
It’s pretty tough to kill a big buck if none exist— that’s why it’s important to locate one or two early. And the post-season is a good time to start. As you scout, keep in mind that whitetails are creatures of habit, so bedding areas, rub lines, scrapes and trails generally show up in the same places every year. Generally speaking, deer are lazy by nature and tend to follow the path of least resistance. In most cases, terrain features will determine how bucks move about. It might be a ridge top, pinch point, saddle, or an inside/outside corner, so keep track of these.
Spring shed hunting is another great way to locate this year’s buck. The sheds are hard evidence of the bucks that survived the hunting seasons.
All these places have the potential for becoming stand sites, but rather than rely on memory I like to document my finds from scouting on an aerial photo. Overtime, the aerial starts looking like a roadmap, one I personally use throughout the season.
Low-Profile Scouting
No form of scouting can replace an actual visual sighting. By late August, antler growth is complete, and it’s an excellent time to glass the crop fields from a distant hilltop or side road during the first and last hour of light. As you locate possible candidates to hunt, pay close attention to where they enter and exit the fields. Mark these spots on the aerial map as potential stand sites.
Trail cameras are also great scouting tools. Set them up in early August, and before the season you’ll have a fair idea of the bucks roaming the property, and also where to intercept them.
Hang Your Stands
I’m not a big advocate of intrusive scouting, but at some point it becomes necessary for hanging stands. Before you begin, revisit the aerial map and combine notes from all your scouting efforts. You might have marked several potential stand sites already, but there might be others. Take rub lines and trails for example. If you find multiple rub lines or trails that intersect or crisscross, the junction (or hub) will likely offer the best odds of intercepting a buck.
The muzzleloader season is short, and the right wind might never exist for a single stand option. To play the wind game, look for two stand sites in every area, one for a southerly wind and the second for a northerly wind condition. Be sure to note the location of the sun, and position each stand so you’re not facing directly into it.