There are several myths about crossbow hunting. One common one is you can take a new crossbow out of the box and hunt with it the same day. I guess you could take a horizontal — or vertical — bow out of the box and hunt with it the same day, but you’d be leaving out the fine-tuning details that ultimately create success. For that reason, I follow a routine to ready my crossbow and gear, whether it is a new hunting season or a new crossbow. In either case, here are a few items to consider for best results.
Arrow
Selecting an arrow isn’t a difficult process. All the major manufacturers provide premium carbon arrows with new crossbow packages. The only decision is whether you want to stick with a carbon option or switch to something like an Easton Full Metal Jacket. The FMJ is heavier and the added weight increases penetration, which is a boon on a shot where you hit bone, or not exactly where you intended. Additionally, the aluminum outer shaft generates less friction on impact, another plus for increased penetration.
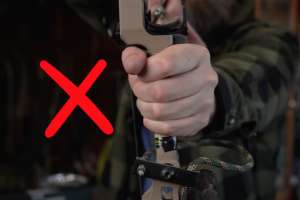
The one big item to remember is to use the proper nock. All crossbows are set up differently, and each manufacturer recommends a specific nock. No matter the arrow you choose, make sure the nock used is the correct one. Refer to your owner’s manual for more information.
Broadhead
I’ve heard the arguments that you can’t shoot fixed-blade broadheads accurately from a crossbow with enough horsepower to make a clean kill. And I’ve heard complaints that open-on-impact heads often fail. However, I have shot broadheads of both types from at least a dozen manufacturers, and I’ve never had a problem with tuning, flight, cutting or penetration. That being said, my success is created from proper testing and tuning.
The main reason a broadhead works is it has been tried, tested and tuned. In other words, the shooter is confident with its use. Currently, for the reasons mentioned above, I shoot a SEVR broadhead. I’ve taken several big game animals with them, without issue. And, by simply adding a set screw, the same head can be used to practice.
Spin and Balance
Arrow spinning provides fine-tuning for your projectiles resulting in consistency downrange. An arrow spinner is an inexpensive piece of equipment that allows a hunter to grade and mark the quality of each arrow. Once you have selected an arrow and broadhead combination, put them together and spin them.
Shoot and spin all of your arrows. There should be some standouts in terms of accuracy and consistency. Some will fly straight, smooth and silent. Find your best arrows and mark them for hunting. A simple 1, 2, 3 will work, indicating the first arrow you’d put on the rail for shooting at the biggest buck of your life.
Slight wobbles in less-than-perfect arrows can often be fixed by finding the imbalance, which is usually in the insert or broadhead. Applying pressure to the offside of the imbalance can often straighten it out. Use these arrows in a practice setting and as backup hunting arrows.
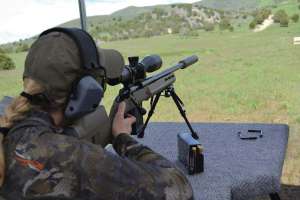
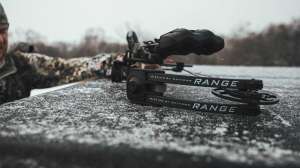
Chronograph
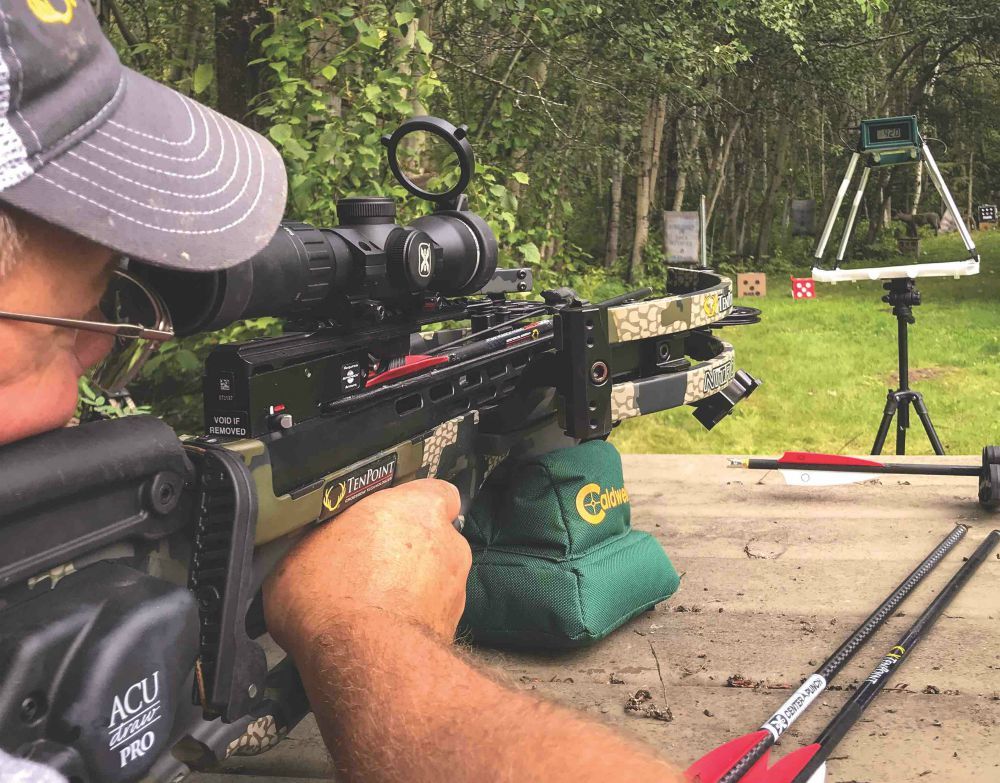
I always use a chronograph (photo above) to measure arrow speed. It lets me know how consistently a crossbow shoots. I don’t get hung up on the numbers, as speed is only one component of the overall equation. Manufacturers use speed as a marketing tool, but accuracy is what kills.
Consistency and accuracy will stand out on certain models of crossbows. In terms of consistency, one of my best test cases was with my TenPoint Nitro XRT. The first three arrows off the rail came in at 220 fps, the next was at 219 fps. Shooting for half an hour, the largest gap in speed was just 2 fps. Ultimately, a consistent crossbow is more accurate.
Sight-in
I recommend beginning your sight-in at 20 yards. Once your 20-yard mark is dialed-in, move on to 40 or 50 yards to sight-in again. The basic rule is to sight your bow for 10 yards less than your maximum hunting distance. In my case, the Nitro XRT shoots extremely fast, so my maximum range is 50 yards. I made a few simple adjustments to sight the scope to be dead-on accurate at 40 yards.
Once accurate and comfortable at longer ranges, go back to the 20-yard target and see what happened to the point of impact. Sending a couple arrows down the rail, they’ll likely hit about a half-inch high compared to the initial sight-in at the start. The slight increase in elevation is worth the accuracy downrange at 40 and 50 yards.

Practice
I always go through an exercise of shooting targets with the wrong aiming point. It’s an exercise that teaches you the trajectory of your arrow and how important it is to judge distance correctly. Shoot your 40-yard target with your 30 and 50-yard reticle marking. The elevation distance between the bull’s-eye and where your arrow struck is worth noting. At closer ranges, the drop isn’t as severe, but as you get farther out, you’ll see why it is important to know the range of an animal before shooting.
Use your smartphone to video your arrow in flight. Seeing the drop at longer ranges is an eye-opening endeavor. If available, the slow-motion mode on a phone’s camera will capture the arrow in flight, allowing you to see the trajectory. Seeing is believing and allows you to understand your equipment and how to use it effectively.
Whether you’re bowhunting spring turkeys and black bears, or preparing for fall whitetail hunts, following these guidelines, you’ll be tuned and ready for any challenge. Take the time to test and mark your best arrows, tuning them to broadheads. Finally, practice from field positions.