“Don’t shoot something where you can’t get a horse,” I’ve heard many times out West from outfitters and other guides. True, a horse can make packing a load much easier, especially a bull elk, and definitely a moose. However, hunting with a horse isn’t always practical for the average hunter. For those of us afoot, technique and practice can help maximize the efficiency of a pack out.
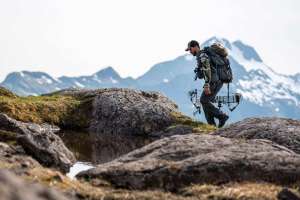
My experience packing comes a little from being an avid hunter myself, but more from countless pack outs during my 9 to 5 — for the last 7 years, I’ve guided big game hunters full time, often traveling through the hemispheres to hunt fall ruts. My adventures in the hunting industry have led me to New Zealand, British Colombia, Tanzania, Wyoming and Colorado. Traveling to new ecosystems and diving into hunting new species in each location has further enhanced my appreciation of the animals, but also of universal hunting practices and techniques.
While I’ve mainly used horses and mules to pack game out while guiding in wilderness areas in North America, in New Zealand we typically foot hunt. The lack of tags and government-mandated game seasons in New Zealand has given me bountiful opportunities to employ, practice and tweak my pack-out techniques. To give you an idea, in New Zealand, my clients average hunting four animals a week for a 6-month season! With no predators, culling to manage populations is necessary, and we recover these carcasses as well to donate the meat. With these numbers of carcasses to deal with and carry out, proper technique is imperative for efficiency and longevity.
Growing up in Florida, mountain hunting and longer totes were foreign to me. However, the opportunity to learn a myriad of measures from different people as an adult, instead of simply doing something one way “because that’s how I do it,” has given me a more diversified understanding. Also, at 5-feet 4-inches and 120 pounds, what I lack in size I have to make up for in skill.
The following article entails some pack out techniques that I find most efficient and comfortable for a multitude of different situations that may be encountered. Armed with this quiver, you will have the best technique for each situation.
Whole Animal Backpack
Packing out an entire gutted animal keeps the meat clean and together, ideal for aging. While this technique is impractical on larger species such as elk or moose, it’s manageable for smaller deer species. However, weight isn’t the only challenge; the awkwardness of an unbalanced load can make even a short walk difficult. Constructing a quick backpack out of a whole animal secures positioning and provides control of an otherwise unwieldy load. Important tip: Make sure to secure a bright color (think blaze orange) to any animal part when packing out to save any potential incident with another hunter.
This improvised backpack, while not as comfortable as a commercial one, effectively distributes weight and, most importantly, allows you to get the job done. Animals can be transported whole or gutted. Field dressing reduces overall weight and allows faster cooling of the meat, ensuring better quality and simplifying later processing. Removing the head further lightens the load if toting a female animal.
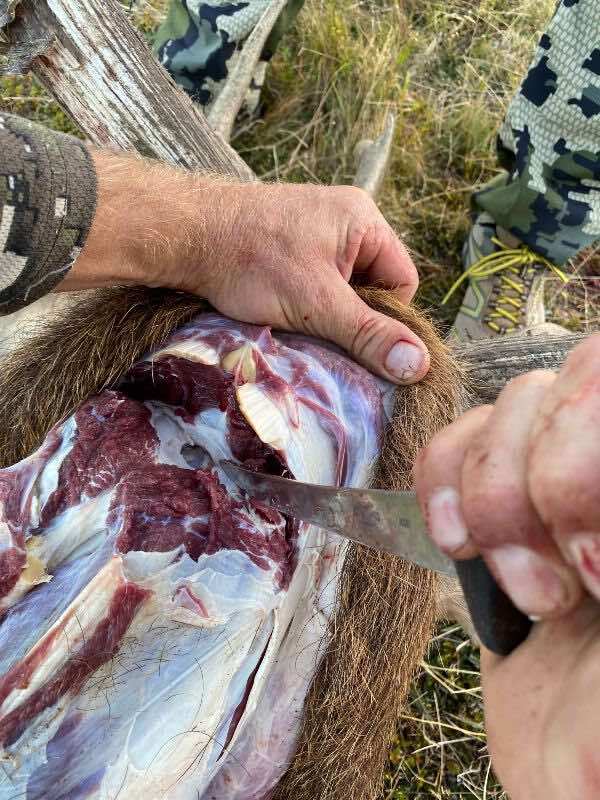
To detach the head, bend the head forward towards the animal’s chest and work the tip of your knife down into the joint between the skull and spine located at the back of the ears (photo below). When the joint is successfully pierced by the knife, fluid will be released and a dark cavity will be visible. Extend from this point along both sides of the joint, cutting through the connective tissue slightly above this hole and continuing back to the same level around the side and front of the neck. After the tissue around the joint is severed, twist the head to further open the joint and slice through the remaining attachments inside.
For trophies, the head (and cape if desired) can be carried separately or left attached, although the unsupported, weighted head on a limp neck may compromise balance through rough terrain.
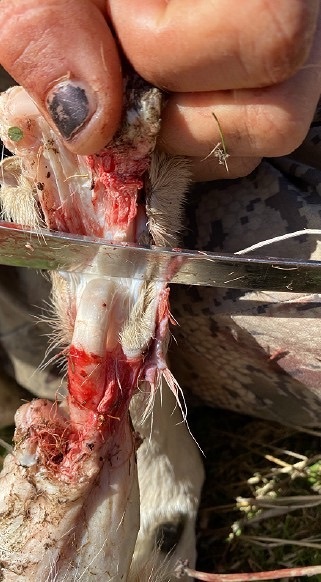
To create the pack, bend the front knee and sever the lower break in the joint by cutting at the bottom of where the bend occurs. Because this joint is composed of many flat and uneven carpal bones, freeing the lower connection will achieve a smoother and more straightforward break. Severing the connections around the front and sides of the joint will allow a twist to free the break without compromising the strong suspensory ligament at the back of the joint. Once the joint is free, run the knife parallel to the bone for about 3 inches towards the hoof to release the ligament.
Once both front legs are prepared, cut slits in the skin above the hock joint between the Achilles tendon and the leg on each hindquarter. These slits should be large enough to pass a front hoof through. Thread each front leg through its corresponding hind leg slit until the cut joint. At the break, turn the lower portion of the leg perpendicular to form a "T" against the slit, completing the pack.
Even though it is slightly heavier, retaining the lower hind legs serves as stabilizing levers for the load. On larger bodied deer, such as red deer, I find that pulling the front legs through from the inside out is more comfortable on my narrower shoulders. Experiment to find what works best for you and your load.
Hog legs are too short for this technique, but cord can be used to make a similar pack by fastening the legs together with a tight loop above the dewclaws on front and back legs. Cord looped around the bottom jaw can help control the heavy head, balancing the load.
Back Legs or Shoulders Technique
When only part of the animal is desirable for consumption, or for when additional people are available to tote, typically the usable meat is portioned to fit in or on a pack. This technique, however, allows for efficient transport of quarters without a pack or when packs are full.
Quarter the legs from the animal's underside as usual, but keep the skin on and connected between opposite legs (shoulders together, hind legs together). Drape a leg over each shoulder, fur side down. For smaller animals, the lower legs serve as handles for balance, though for large ones, the hock joint can be broken to remove the lower portion of the leg to reduce weight. When the joint that allows the movement in the hock joint is severed, the integrity of Achilles tendon, prized for hanging meat, is lost. However, by freeing the lower joint, this vital tendon is maintained and the lower leg is easily removed.
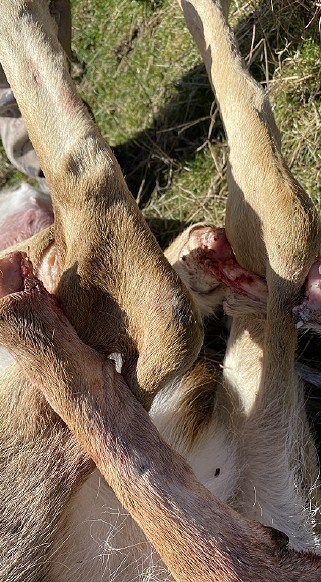
Cut straight across and around at the slight bump below the area on the hind leg where the bend occurs. Finding the correct joint is easier once the hair is removed and a visible bulb can be seen. If in doubt, work up from the straight and flat cannon bone of the lower leg until the first slight bulge. Connective tissue all around this flat joint holds it together, but connections are the thickest on the sides. Once these are severed, pushing the joint towards the inside and back will open it with minimal effort.
It is easiest to break this joint when the hindquarter is still attached, holding the upper portion of the leg in place. Cut slits above the hock for handholds if the lower leg is removed. A wider skin portion between legs distributes weight more evenly across your neck and shoulders. When carrying, ensure the skin lies flat to avoid concentrated pressure points.

Deboning Quarters
Skinning and deboning quarters to carry out in a pack is undoubtedly the most comfortable method for any tote. While this approach sacrifices the structural support and protective benefits that bones and skin offer for hanging, transport and aging, it significantly reduces weight and bulk — a crucial advantage in backcountry scenarios.
A technique for deboning quarters without breaking them down into muscle groups or compromising prime cuts can be employed after separating the quarters from the carcass and hide. Learning to debone while maintaining muscle connectivity of the entire quarter may be important when hunting in a state or province where the law requires you to keep meat from each quarter together with proof of sex. Perform this process on the hide's interior or the animal's carcass to maintain meat cleanliness.
For hindquarters, position the quarter inside-up and cut along the seam of the small meat flap between the exposed ball joint bone and stifle. Angle downward beneath this flap, between muscle groups, until reaching bone. Slide the knife gently along the bone to free the meat without dulling the blade. I prefer longer knives with somewhat flexible tips for this, but any blade will suffice. After the femur's center is freed, cut the meat and sinew from the top ball joint. Hold the ball joint upright, using gravity to assist in separating meat from the stifle joint and shank.
While the front shoulders may seem like more work, understanding anatomy will make them simpler. Cut behind the shoulder blade's central protrusion from the topside. Slide the knife flat along the blade once bone is reached. Cut down the protrusion's front and along the blade. At the blade's end, curve underneath and continue freeing meat along the backside. Work from the top down to preserve connections to remaining shoulder meat. As with hind legs, use gravity to help separate meat from the lower bones. Exercise caution near joints to maintain muscle connectivity.
Fastening Quarters to a Pack
When supplies or camping gear leaves limited pack space for harvested meat, whole cuts can be tied to the pack's exterior. For structural integrity, leave bones in when fastening quarters. Without the bones, it’s almost as difficult as trying to tie jelly! Additionally, leave the hair on to protect the meat if possible.
Two key considerations when securing a load are centering it to avoid imbalance, and fastening it tightly to prevent shifting. Uncentered loads, especially top-heavy loads, can escalate a situation where the carrier is slightly off balance. Loose loads, too, allow play that can alter weight distribution, unbalancing a packer or causing the load to come undone.
Pack frames with game shelves simplify this process: place quarters on the shelf with legs upward and secure with horizontal straps. The pack portion can then be secured on the outside of the meat.
For other packs, assign flatter cuts to the interior and meatier cuts to the exterior. For instance, rib sections can be tucked between the pack and a hindquarter. Balance is crucial; equally sized quarters can overlap slightly on either side, while uneven cuts should be stacked facing opposite directions. Ideally, limit external loads to one quarter, with remaining meat deboned inside the pack. Excessive weight attached away from the frame compromises balance and maneuverability.
Use the pack's tie-down straps, cinching across the load or in an X-pattern. Additional rope or paracord can enhance security, particularly between horizontal cinches and around the meat's bottom. For packs without straps, create horizontal latches with rope, then cinch these together. If possible, secure the bottom and shanks with vertical bights to minimize movement.
Heads can be attached to the pack's top or middle, with antlers facing downward and backward for safety.
These techniques should help you make the most of your harvests and maximize meat recovery in any scenario. The best way to internalize them is through hands-on experience, so consider trying them out on your next hunting trip. Happy hunting!
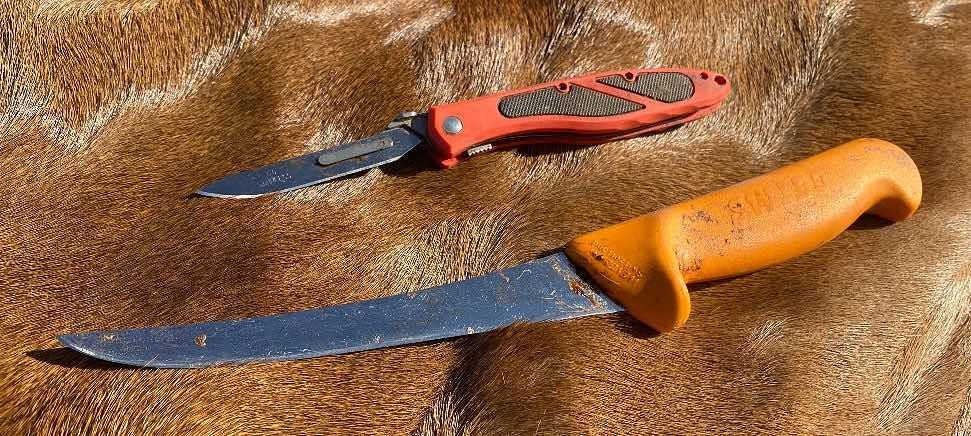
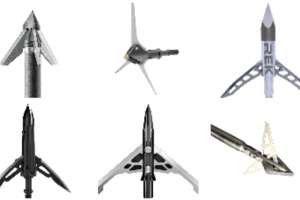
Sidebar: My Favorite Hunting Knives
While I always carry spare knives in case of emergency, I have a “one knife for everything” outlook when it comes to handling big game in the field. For this reason, I use a boning knife for caping, skinning, gutting, quartering and deboning.
My 6-inch blade peels off at least double its length with each stroke skinning, and requires only one pass to reach the bone when deboning a hindquarter, maximizing the efficiency of my work. The length also allows me to delegate different tasks to different portions of my blade, such as only cutting joints, tough connective tissue, and against bone with the lower portion of the blade up against the handle, keeping my tip sharp to cut through skin. Most importantly, I can reach an animal's heart from behind their front leg with this knife and finish them humanely without damaging a cape for a mount.
I always keep a steel in the sheath with my boning knife to keep the edge on my blade as I work. I prefer Victorinox’s boning knives because the steel is somewhat soft, making it easy to stand the edge back up in the field and quick to sharpen at home. No wonder butchers use these knives because they work well for the quantity of animals and efficiency.
A long blade is a lot to handle, but practice for technique pays dividends in the long run with the improved efficiency. That being said, I keep a Havalon Piranta-Edge skinning knife as my spare, so I know I always have something sharp and to use for head skinning where the 6-inch blade of my boning knife can get in the way for delicate work. Although Havalon is slightly more expensive than some of the other replaceable razor blade knives on the market, the quality of the blades seem to be much better, not breaking as easily to unintended lateral pressure.
Victorinox 6-inch boning knives, curved or straight, are readily available online or in most kitchen or home stores around the world. I find the straight blade to be simpler for gutting animals, though a curved blade is slightly smoother when boning out meat. Victorinox blades are utilitarian and are therefore priced as a tool, not as artwork, keeping costs very reasonable. On Amazon, they are retailing for $25-$35. Most outdoor shops carry Havalon knives and blades, and although they are a slightly greater initial investment ($56), they shouldn’t break the bank either.
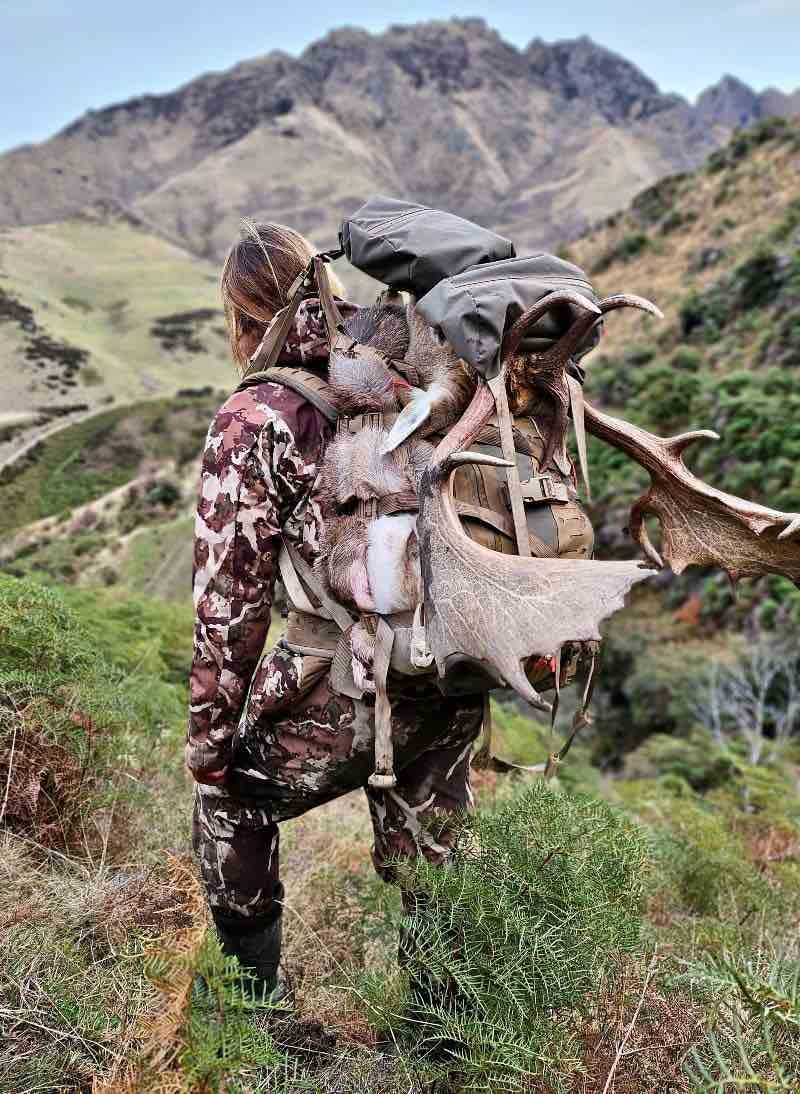
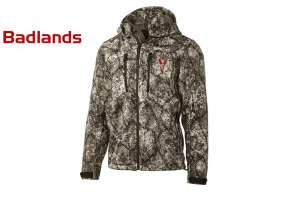
Sidebar: Perfect Packs
In my opinion, Alaska Guide Creations Kobuk Backpacks are perfect for hunting, backpacking and toting out a heavy load. The carbon rods keep the frame light but strong, and the foam helps the fit and comfort when loaded. Most importantly for me, everything on the frame is adjustable, so no matter your size, this pack will fit you perfectly.
Alaska Guide Creations has a detailed video on its website to show how to properly fit and set up your frame once you’ve purchased it. The meat shelf is ideal for back-to-back hunting missions because it lets you keep your gear and the inside of the pack clean and accessible, while loading the weighty meat near the frame.
For functionality and comfort, this pack is the complete package. You can buy the Kobuk frame with the 28 liter bag for $639.98 on the website: alaskaguidecreations.com. If you’re repetitively carrying heavy loads, this is what you need!
Sidebar: Timing Is Everything
As imperative as getting your meat home, is keeping it from spoiling. Breaking your meat down further by skinning and deboning it will allow the meat to begin cooling quicker if hunting in hot conditions, far from a cooler or freezer.
Keeping meat cool and dry are the two most important things we can do to mitigate spoilage. Therefore, I spread quarters or boned out meat in the shade when I’m able to cool and dry meat slightly before packing together. Also, avoid using plastic bags that trap heat and moisture, and instead store meat in breathable game bags, pillow cases or cheese cloth.
Consider temperature and timing to get the meat to a cool location when determining which technique to use to pack out your game. The work of a large packout isn’t worth it if the meat spoils, so take time and do the extra steps needed to break down and let meat cool before the trip out if needed.
If your meat stays warmer than desired on the pack out, shorten or skip aging meat and use or freeze the meat right away. Freeze meat in small, four-person portion sizes to ensure the meat is quickly frozen through.
Photos by Bre Lewis