Sometimes you have to go out and catch some bluegill in fall weather so there’s fresh fish to have with hominy grits. And there’s an argument to be made that there’s no other fish better paired with grits than a mess of bluegill.
Why you ask? If you choose to scale and fry bluegill whole, you’ll find the fins fry up like bacon. Grits with crumbled bluegill tail mixed in is something similar to biting into little bits of bark on a smoked pork shoulder.
How to Clean and Fry a Bluegill Without Filleting
Many, particularly in the South, have never eaten a bluegill any other way. This is also a method passed down by people who didn’t have the means or food supply to be selective about the size of the fish they took. If a fisherman had a fish on, it went in the boat. It didn’t matter if it was big enough to fillet or not.
To pan fry whole bluegills, here are the short instructions:
- Scale it.
- Chop the head off.
- Fry it up.
More detailed instructions are here:
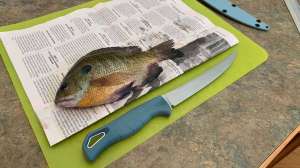
Use a spoon to scale the fish. (A knife will work, but not a fillet knife. It’s too bendy.) You can use your free hand to hold the fish in place by the end of its tail. Work your way up the body from tail to gills, scraping the scales away with the spoon's edge.
Scale up past the Pectoral Fin.
Remove the head by using your knife to come in at an angle, from top to bottom. You don’t want to cut straight across because you’ll lose the shoulder meat. Go in above the gill plate and then turn and come down, so the bluegill is almost cut in a “V” shape at top.
Next, cut out the belly by running a knife along the underside of the fish. Then reach in and remove the guts. Rinse the bluegill, inside and out, with water. Then place the fish in an ice-cold bowl of water.

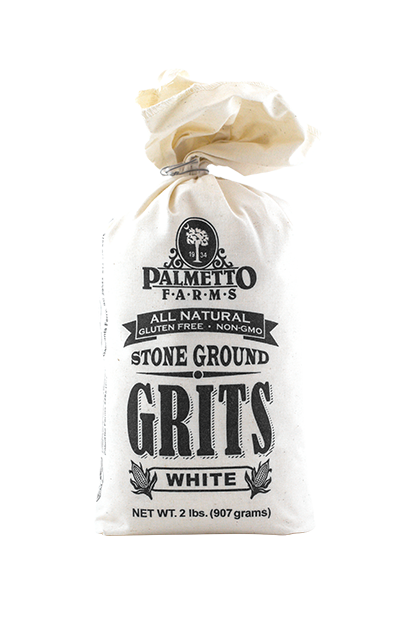
About your cornmeal. You can use any cornmeal mix. The mixes available specifically for seafood are best. (I like the Kentucky Kernel Crunchy Corn Meal Mix.)
Eggs and cornmeal mix. Coat the fish in egg and then dredge each in the cornmeal mix. Some skip the egg coating and go straight to the cornmeal.
Heat your cooking oil. Make sure it’s good and hot by flicking flour or your cornmeal mix into the oil. If it pops and sizzles in response to the flour, the oil is ready. If the oil isn’t hot enough, you’ll end up with breading that soaks up too much oil and doesn’t become as crisp and light as it could be.
Fry your bluegill until golden brown. Keep in mind, you’ll likely need to fry the whole bluegill longer than a fillet so the fish can cook through to the bone.
Bonus Tip. About a year ago, a Grand View Outdoors reader commented on one of our fishing articles. His post was published under the name Larry, and he said this about eating whole bluegill: “After frying, just before eating, remove all the fins, rear to front. With a little practice, when the fins are removed, all the small bones come out with the fins, leaving the meat on the backbone.”
If you’d like to watch the process of scaling, cleaning and frying bluegill, you can watch Shotgun Red go through each step at the bottom of this article. (These steps are featured in the first 4 minutes of the video).
Tips to Better Grits
Purchase your grits and follow the instructions on the package. With grits, stirring constantly as they boil, is important. Continually stirring as they simmer at a lower heat is equally important.
Add butter, salt and pepper to taste. Honestly, grits require a lot of salt. If you've made grits at home, and they simply don’t taste like the grits you get at restaurants, this is one reason why: The restaurants don’t skimp on the salt. If you're on a low-salt or no-salt diet, consider purging all salty foods so your salt quote is low enough to have grits that are properly salted. If this is too risky, then it may be time to give up on grits altogether.
Another reason you’ll often find grits on the menu that are superior to your homemade version is texture. The truly glorious grits are smoother, creamier. In many cases, this has to do with the addition of heavy whipping cream. Once your grits are cooked and seasoned, add heavy cream just before serving. Typically, one tablespoon to each cup of cooked grits. However, you’ll see the texture change and become smooth as you add the cream and this transition will guide the amount you add to your grits. Prior to adding the heavy cream, you can see the tiny grains, if you look closely. After adding the cream, the grains are blended, making the grits uniform, closer to the consistency of a thick gravy that's been sitting out on the kitchen table for too long.