A month ago I gave a buddy one of my trail cams to place on property we hunt together. I recently visited the land to bowhunt whitetails and switch the cam’s memory card. It was approximately noon, and as I approached the cam in the spot we’d discussed, I couldn’t believe my eyes. He placed the cam pointing straight south, which in the upper Midwest, means the camera lens is looking right into the sun for much of the day. Shaking my head, I removed the camera, walked to the south side of the east/west-running deer trail, and found a suitable tree so the camera could be pointed north, away from the sun.
If you’re relatively new to using trail cams, then you’ll find the following four tips helpful. I’ve been running trail cams since the days of 35mm film models (mid 1990s), so I’ve learned a thing or two about getting decent pics and reducing the number of false triggers.
1. Point a trail cam away from the sun.
In Minnesota, South Dakota and Wisconsin, which is where I do the vast majority of my whitetail hunting, this means pointing a trail cam north as much as possible. Aiming a cam east, toward the rising sun, is a recipe for disaster, and the same is true for aiming it west, toward the setting sun. I also avoid aiming it south, because between sunrise and sunset the sun occupies the southern sky. Pointing a trail cam east, west or south in the upper Midwest can result in glare ruining deer pics. Whenever possible, find a tree that allows for pointing the camera away from the sun. In my area, this means north.
2. Place a trail cam 4 to 10 yards from the action.
This bit of advice is dependent to some degree on the lens in your trail cam, but in general, too close (less than 4 yards) and too far (more than 10 yards) results in poor-quality images. Too close and you’ll get pics of rumps, tails and antler tips because a deer passes by too fast to trigger the cam, or a buck’s head is down and you don’t have a field of view large enough to capture the entire deer. Too far and the camera might not trigger properly to shoot an image. In my experience, the ideal distance is 5 to 7 yards.

3. Take time to get trail cam lens angle correct.
This tip seems obvious, but I’ve seen it done incorrectly so many times that I must cover it here. Aim a camera too low and you’ll have pics of legs and bellies, and miss deer heads/antlers. Aim a camera too high and you won’t get pics of anything except squirrels and birds. Because the best tree for a trail cam is often a leaner, it makes sense to carry a device that allows you to position a camera perfectly. One of my favorites is the Adjustable Mounting Arm from SpyPoint. It rotates and tilts to allow ideal trail cam angle, and it fits any cam with a standard 1/4-20 screw-in tripod mount. If there’s not a suitable tree for a desired trail cam location, then I like to use the Moultrie Camera Multi-Mount and attach the cam to a t-post or pole.


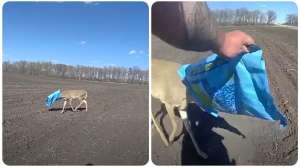
4. Trim saplings, brush and weeds between trail cam and deer trail.
False triggers go up tremendously if you fail to trim saplings, brush and weeds. On days with no wind these objects might not trigger the camera, but combine wind, sun and obstructions and you’ll have a memory card filled with false triggers. The fastest and most effective method for clearing obstructions is with a hedge shears and pruner. I especially like the Hooyman Ratchet Pruner, which makes quick work of brush and small branches.
Remember these four tips and you’ll increase your chances of capturing well-lit pics of a buck’s entire body, while at the same time eliminating hundreds of frustrating false triggers.