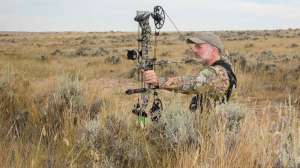
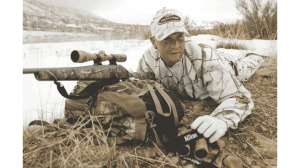
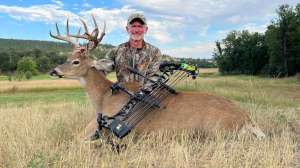
Get away from the bench and practice field shooting positions so when the time comes, it will be old hat. Photo: Bob Robb
When I was a 20-something smarty pants who thought he knew everything, an old army rifle instructor told me something about hunters and their shooting that has stuck with me. “Why is it,” he growled, “that American men think they were born crack shots? In any other athletic discipline, participants practice until they wear the skin off their hands and feet. Most hunters think all they have to do to be a crack field shot is haul their rifle out of the closet (where it’s sat idly by since the last day of deer season), run a handful of rounds downrange to make sure the scope is close, then go hunting. It’s a wonder more big game isn’t missed or wounded.”
How right he was, on both counts.
Too many hunters shoot too few off-season practice rounds, and those they do shoot are generally fired from the comfort of a bench rest. Ideally, you should begin your practice sessions right now, and try and get to the range at least once a month, ramping up your sessions to at least twice a month as the season gets closer. It’s hard to practice your shooting too much. The key is this: Once you’ve sighted the rifle in with the exact same load you plan to hunt with, get away from the bench and start practicing from a variety of shooting positions that replicate real hunting scenarios.
I worked the shooting events at the 1984 summer Olympic Games in Los Angeles, where I met Lones Wigger. He’s the most decorated rifle shooter America has ever produced. He made every Olympic Shooting Team between 1968 and 1980, and held or co-held 27 world records — 14 team and 13 individual. He won 58 National Championships — of almost every variety. In 1964 he won the gold medal for the three position small-bore rifle, and a silver medal for small-bore rifle, prone position. In 1972, Wigger also won the gold medal for free rifle, 3 position.
Wigger graciously helped me understand how to dope the wind, among other things. But he also told me how important it is to make every squeeze of the trigger count — even when practicing. “When I practice, every shot gets my best effort,” he said. “Consistency is everything. And so, when I can no longer concentrate, I quit for the day. Otherwise all you’re doing is ingraining bad habits.”
Wigger was right. As with any sporting activity, bad shots in practice amount to bad shooting afield when the pressure’s on. Shoot slowly and deliberately, so much so that you should be able to call most all your hits on the target after the trigger squeeze.
Think such a practice costs an arm and a leg?
Not when you do the bulk of it with a .22 rimfire rifle that closely matches the feel of your deer rifle, and a couple of bricks of .22 LR ammo. Once sighted in, I like to shoot at 2-inch squares of white paper stapled to a big sheet of cardboard at 50 yards. Utilize all the shooting positions, concentrating on your breathing and the trigger squeeze. Oh sure, I still practice with the big guns, but using the .22 helps me “groove my swing” without beating my body to a pulp. One other note: When setting up for the kneeling and sitting positions, remember that it’s all about bone-to-bone contact when trying to achieve maximum stability.
Here are the 10 practice positions/scenarios all hunters should strive to groove prior to opening day.
10. Standing
For me, shooting from the standing position when hunting is like kissing my sister, if I had one – a Bozo no-no. It’s the hardest position of all from which to shoot accurately. However, there are times when it’s all you’ve got. So work on your form and your breathing, while telling yourself that a slow hit beats a fast miss, all day, every day.
9. Kneeling
Kneeling is my second least-favorite shooting position, probably because at my age it’s harder than ever to assume the proper position. This is where bone-on-bone contact is critical. Right-handers, when you kneel, have your left forearm and left leg below the knee form a straight line.
8. Sitting
The sitting position is the field position I tend to use most often. It’s stable, especially when you can add shooting sticks or some other rest for the rifle’s forearm, and it helps you get taller than most brush. I like to lock my elbows inside my knees whenever possible for added stability.
7. Prone
The most stable of all the four classic shooting positions, prone is the way to go whenever possible. Use either a bipod or your daypack as a rest for your rifle’s forearm. And whenever possible, keep the body in straight line with the rifle, not with your legs set at an angle like most of us do.
6. Use Shooting Sticks
Collapsible shooting sticks have come a long way over the last decade or so, with today’s models being easy and quick to deploy, and extremely stable. Tripod sticks are the most stable, but bipod sticks deploy quicker and are quite stable as well. They come in several lengths, with some designed for shooting from the kneeling or sitting positions, and others designed for those who are shooting standing up. Practice getting them set up quickly, then moving as rapidly as possible into your shooting position.
5. Uphill/Downhill
Mountain hunters know that shots rarely come over flat ground, and that uphill and downhill angles will change a bullet’s trajectory. That’s where employing a laser rangefinder with a drop compensator can help take the guesswork out. Still, getting comfortable behind the rifle when shooting at extreme angles takes some getting used to, so be sure to work on it.
4. Long Range
Despite what you might have seen on a cable TV hunting show, making a long-range shot on an animal is extremely difficult, and not recommended. It takes a rifle/load/scope combination that can produce minuscule groups at distance, an accurate rangefinder (and the skills to properly use it), and a stable rest. Still, extending your own maximum effective shooting range will make you a better shot at moderate distances, so practicing a few shots “way out there” should be part of your off-season routine.
3. Snap Shoot
We all strive for controlled condition that permit taking our time in making the shot. Sometimes, though, things happen in a big hurry and you have to shoot quickly. Often this can involve shooting through a small window in the trees or brush. And dangerous game hunters? You best work on this dance move! Unless you practice, it’s nothing more than a Hail Mary. Work on it.
2. Into the Sun
Sun at your back is the first rule of shooting, but sometimes the critters have other ideas, and you find the sun in your face. Work on shading your eyes and how to keep the glare off your scope lens so you can make the shot count.
1. In the Wind
Until you start shooting at longer ranges, it’s hard to comprehend how much even a 10-mph crosswind can push a bullet. You have to do some shooting in the wind to know how it effects your own hunting load. Also the wind will try and buffet you about as you rest the rifle and take aim. The rule of thumb is this: The stronger the wind, the lower to the ground the shooter needs to get to minimize its ability to ruin your aim.
What about you? How do you practice for hunting season? Any tips for our readers? Drop me a line at editor@grandviewoutdoors.com and let me know.