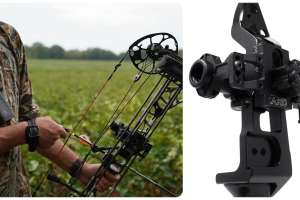
Watch cable TV hunting shows and YouTube channels, and you see guys taking shots at both targets and game seemingly halfway around the world. It’s all over social media, too. At the end of the day, the uninitiated might come away thinking long-range shooting is pretty easy. All you must do is spend a bunch of money on the right equipment and presto! You’re sniper ready.
Nothing could be further from the truth.
Though I have been a rifle shooter most of my life, been to long-range shooting schools and spent a fair amount of time with both military snipers and very serious gong-ringers who can hit a 36 x 36-inch steel plate at 2,000 yards on a regular basis, I am no expert. One time I did win a little informal “Shoot & Scoot” competition with some SOF guys with lots of combat experience and a couple other outdoor writers, ringing gongs at unmarked distances between 100 and 1,000 yards, but that was my best day ever. Truth be told, for me, shooting at game — not inanimate objects — past about 400 yards makes me very uncomfortable. It’s serious business.
What long-range shooting practice will do for riflemen is make them a more consistently accurate shot at all distances — near to far. Long-range shooting magnifies every little flaw in shooting technique, exposes inconsistencies in rifle/load combinations, reveals mistakes in wind doping and range estimation. When hunting, you’re not trying to hit a man-size steel plate “someplace,” but a small area the size of your target animal’s vitals.
Want to get started? Here are 10 steps to help you hit your target with the first shot at all ranges.
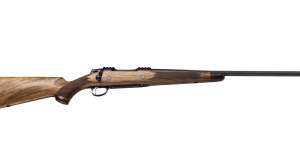
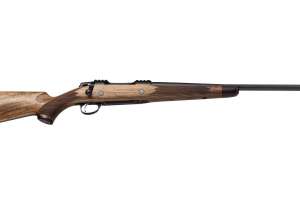
Step No. 1/The Foundation … It all starts with a rifle/load combination that consistently shoots tight groups at all distances — not just 100 yards. While that’s possible with today’s excellent factory ammo, most long rangers are handloaders. Use bullets designed for long-range accuracy, which means longer and heavier for caliber (Example: 190- or 200-grain .30-caliber bullets instead of 150- or 165-grainers in a .300 Win. Mag.). As one sniper told me long ago, “In this game, speed does not kill, precision does. A slow hit beats a fast miss every time.”
Step No. 2/A Perfect Fit … The rifle must fit you exactly. You can buy rifles with adjustable stocks, or add on auxiliary cheek pieces, as well as butt plate extensions for adjusting length of pull. The scope must be positioned until you can aim through it perfectly without moving your head off the stock. Everything must fit like a glove.

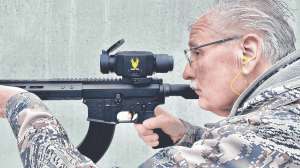
Step No. 3/The Riflescope … You get what you pay for, and here is where you need to spend some real money. Optical quality is paramount, as is a scope with precise windage/elevation adjustments, parallax adjustment and an eyepiece that can be focused to your eyesight, so the reticle is crystal clear.
A key question is: What is best, a first or second focal plane reticle? Those who shoot almost exclusively at long range often prefer a reticle in the first focal plane, because the reticle size adjusts with the magnification level so the measurements are always accurate — a mil at 5X is always a mil at 25X. With a second focal plane scope, the reticle is only valid at one point across the entire range of magnification — usually the highest magnification level. At other levels, you will need to calculate a variance based on the magnification setting in your head as you take a shot, which can be an issue if you do a lot of shooting at a lot of different magnification levels. In a second focal plane scope, the reticle will appear to be the same size across the magnification range.
Step No. 4/Parallax Adjustment … To properly adjust this very important and oft-misunderstood adjustment, sight-in at whatever distance you are shooting, turn the knob until everything is blurry and then bring it back until it is in focus. Also remember this is not a focus knob, so you move your head in a swaying motion while looking through the eyepiece and make sure the reticle is not moving. When this occurs, parallax is correct for that distance. If parallax is not correct and your cheek is not consistently placed on the stock or your head position behind the scope is inconsistent, it might seem like your point of aim is proper, but the point of impact might be off downrange. This might not be noticeable at shorter ranges, but everything intensifies at extreme ranges.
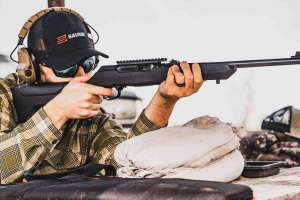
Step No. 5/Body Position … For extreme long-range shooting, prone is by far the most accurate shooting position. When going prone, it is important to get your body parallel to the rifle. That might seem a bit unnatural at first, but it’s important. Why? “If your shoulder is canted to the side, the recoil can ‘roll’ you to the side, which will take you off target for both follow-up shots and/or make it impossible to see your hits through the scope,” said Tom Maciak, Engineering Technical Leader at Trijicon, and a very serious long-range shooter. “I always tell people they need to get their butt behind the rifle. Here’s how to tell whether you are in the proper position. Get into position, take a breath, close your eyes and relax — which will help your body relax — then open your eyes. If your body has moved, you will not be on target.” And always rest both the rifle forearm, as well as both the rear stock and back elbow, whatever shooting position you choose.
Regarding a rear rest, use a sandbag, glove or anything else available and place it under the stock. There are “squeeze” bags made for just this purpose. You can change the elevation of your shot by squeezing or relaxing the rear rest with your non-trigger hand. Your trigger hand is only for fine tuning left and right and squeezing the trigger. If you use your other hand and a rear rest to adjust up and down, you’ll be a much more accurate shooter. Also, when using tripod shooting sticks, always position the farthest leg between you and your target. This allows you to lean into the rifle for proper form, and the sticks will provide maximum stability. When shooting off any support stick (monopod, bipod or tripod) grip the forearm of your stock and the shooting stick(s) with your forward hand and pull the stock down into the stick(s) for the most stability.
Step No. 6/Even Steven … It is critical that the horizontal reticle is horizontal to the imaginary horizon, even if you are set up on a hill. If the rifle is canted, your shots will be hitting left or right, depending on how the rifle is positioned.
Step No. 7/Turret Scopes … Very popular these days are scopes with turrets that can be adjusted so you can dial in the distance, then place the crosshairs on the target regardless of the range. “Before heading afield, it’s important you develop a ‘dope sheet’ for your rifle/load combination,” Maciak counseled. “To do that, first chronograph your load, then use an online ballistics calculator to give you the numbers. Be sure to plug in anticipated environmental conditions — altitude, humidity, ambient temperature and so on — which you can do with a little online research before you travel to wherever it is you will be hunting. When chronographing the load, take an average of five shots before running the online calculations. Without this your turret adjustment system will not work precisely.”

Step No. 8/Range It … It should go without saying that you must know the exact range to your target to make the shot. Like riflescopes, rangefinders come in all price ranges, and when it comes to accurately measuring the range at extended distances, you need a rangefinder that can take a reading off a “soft” object such as a tree or brush. Don’t assume you’ll get accurate readings at the distances advertised by the manufacturer. It’s a great idea to test your rangefinder the same time you test your loads and practice shooting, so you know how it will all work for you in the field.
Step No. 9/The Exhale … When you are behind the rifle your breathing and heartbeat create a rise and fall. The best shooters I know shoot at the bottom of the exhale — some, between heartbeats. At the bottom of the exhale, your body tends to be at its most relaxed state. Also, at the bottom of the exhale most of us have about three seconds to make the shot before our bodies become oxygen deprived, so there is plenty of time. If you are not ready by then, simply take another breath and start over.
Step No. 10/Follow Through … In all rifle shooting, a good follow through is important. How do you properly follow through? It’s simple. Squeeze, don’t slap, the trigger, and hold it through the shot as you attempt to watch the bullet hit the target through the scope.