Whitetail hunters own the market for trail cameras. Don’t even try to take the crown away from this zealous lot. Nevertheless, that doesn’t mean trail cameras can’t be put to work for your predator pursuits. If you’ve wanted to improve your predator surveillance, follow these tactics to picture-perfect photos.
Outfit And Setup
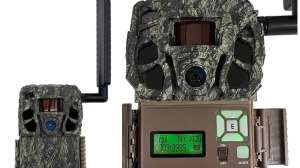
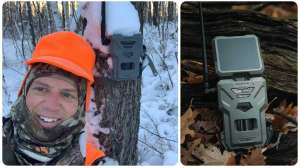
First, snoop the online review section of gear forums and sporting goods outlets like Cabela’s for evaluation on different models of trail cameras. You’re looking for reports of cameras that are rugged, have fast trigger speeds, wide detection zones, don’t require babysitting and are affordable. Infrared minimizes intrusiveness and video may feed your entertainment addiction. Great units at a great price equal more eyes in your predator hunting parcel to capture as man images as possible.
Technology continues to invade the hunting world and if your billfold bulges then the best way to monitor trail cameras is with a live feed. Several companies now market models that zip images and video straight to your screen device. Bushnell’s Trophy Cam HD Wireless meets this demand and even allows you to adjust camera settings remotely.
Once you have as many cameras as your budget allows, load them with long-lasting lithium batteries and the highest allowable SD memory card your unit will handle. Many now accept 32 GB cards.
A final setup note includes whether to use traditional flash or infrared. Flash units give you wall-worthy images, but infrared helps reduce the spook factor. My findings and those of my buddies are that spook factor of a flash is minimal at best, but if you’re just scouting then go with the infrared setting.
Location
Real estate moguls realize that location is everything, so scout ahead of time to position cameras for the highest percentage of
images possible. First, scout for trails, roads and routes that receive heavy predator traffic. Tracks, scats and tips from landowners can lead you in the right direction. Remember, if it’s an active road then your camera may load up with lots of shots of passing truck tires.
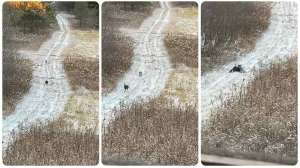
Next, scout for crossings with fences being a top contender. All predators look for the path of least resistance so even consider water crossings like beaver dams or sandbar edges.
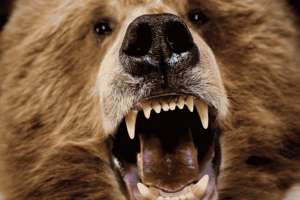
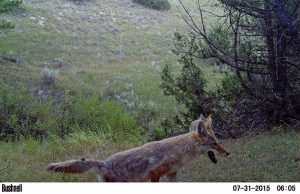
If you stumble across a f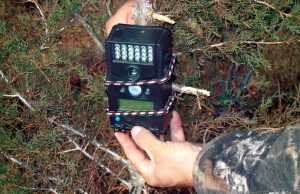 resh carcass, wild or domestic, consider that for an image capture zone. Mountain lions, bears, coyotes and other predators pass by a fresh kill. They may not stop to feed, but the smell of flesh and blood is as alluring to them as perfume on a stunning woman.
Finally, make sure each setup has options for cameras pointed south or north. East- or west-facing cameras fight sun glare at sunrise and sunset leaving you with washed-out images on clear days.
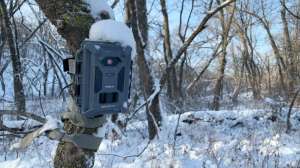
Height And Position
Once you have several positions in mind it’s time to get cameras in the field. There are two schools of thought in camera position: high and low. Most camera experts stress to position units so animals are at face level with it. This works, but for predators you have to think low. An average whitetail measures approximately 3 feet at the shoulder whereas a coyote is a full foot or more shorter. In most cases you’ll have to lower your camera setups if you want in-your-face photos.
Many avid trail camera users have moved to a higher setup with cameras angled downward. This puts the camera out of the field-of-view of most animals, but still allows the capture zone to activate and trigger the camera. Since predators survey surroundings constantly this setup may aid more images of unsuspecting candidates.
If you set up on a trail, consider a 45-degree angle of the pathway instead of a broadside setting. You gain a larger trigger area with more potential to capture fleet-footed beasts.
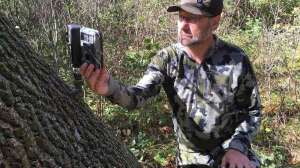
If the area sports lots of grass, limbs and shrubs be sure to trim any in front of the camera. Wind could cause them to sway and trigger thousands of images in no time at all. You may also want to dial down the sensitivity to help with this memory-eating issue. You can then use the trimmed brush to hide the camera.
Security
Most of your hunting brethren are trustworthy, but for the few shifty nimrods you’ll want to secure your cameras, especially on public lands. If you plan on photographing bears consider using bear-proof camera boxes with locks. It protects cameras from gnawing and human thieves.
Another option is to use cables such as a Python cable lock to tightly snug units to trees or posts. If you suspect theft you can also place another camouflaged camera nearby to monitor other units, trails and parking areas thieves may use in an area. It’s also wise to add personal identifying marks and record all serial numbers in case you need to report theft to authorities.
Checkup
 Once you have cameras in place for a time period, don’t be too eager. Checking cameras like you checked for presents under the Christmas tree is a sure way to make predators avoid an area. Plan your visits every other week or more to allow areas to settle between intrusions.
Bring an extra memory card and swap cards instead of viewing onsite. Be scent sensitive and swift. Many of my buddies use ATVs or vehicles to drive up to a site like a farmer checking a field. They’re in and out in minutes.
Trail cameras have the ability to reveal the presence and patterns of predators. They’re great tools and don’t let the whitetail crowd get all the benefits of 24/7 surveillance.