This spring I wrote an article explaining my desire to learn how to sharpen fixed-blade broadheads. The goal was to settle on a system and the required tools by the fall bowhunting season. I’m happy to report that I’ve found my answer.
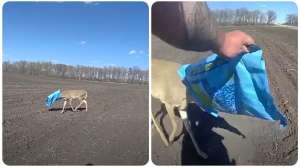
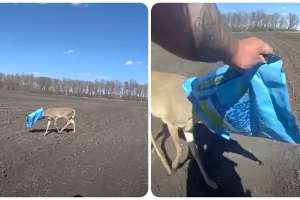
As regular visitors of this website know, I’m a fan of the content produced by the guys from The Hunting Public (THP). In my search for a broadhead sharpening system, I was pleased to find a detailed THP video with another YouTube hunting personality, Ranch Fairy (above, left).
FYI: The THP broadhead sharpening video below is 45 minutes long, but you can take comfort in knowing that the info most desired by you and 99% of bowhunters is covered in the first 25 minutes.
What I love about this system is it’s incredibly simple (read: idiot proof), and inexpensive. All you need is a sharpening jig and various grits of wet/dry sandpaper. The jig used in the video is by Innovative Outdoorsman, and it’s called the Stay Sharp Guide ($20.50). Another jig with a solid reputation is the KME Broadhead Sharpener ($54.95).


The jig holds your fixed-blade broadhead blade at the correct angle for sharpening. Depending on the dullness of the blade, you’ll start with coarse sandpaper (320 or 400 grit) and then work your way through finer grits such as 600, 1500 and 2000.
When sharpening a double-bevel blade (Magnus Stinger Buzzcut blades, Slick Trick blades, etc.), you simply push and pull the jig back and forth in a straight line across the sandpaper with an equal number of strokes on each side. Then you move onto the next finer sandpaper grit and repeat the process.
As the video explains, it’s easy to determine when your broadhead blade is scary sharp. And all you need is a jig, a Sharpie (to see your work), various sandpaper grits and a flat surface on which to work.
Don’t make the mistake of heading into the field this fall thinking your broadheads are sharp. Test them (the video explains how) and have the confidence of knowing you’re doing everything possible to quickly and cleanly kill a big game animal.
For more info on sharpening broadhead blades, check out this video by Ron Kulas from Stay Sharp. In his video, he explains how a burr is formed during the sharpening process and includes some detailed closeup photos of the burr being removed as a broadhead blade is passed over the various sandpaper grits. In the video, Kulas demonstrates with a disassembled Slick Trick broadhead that passed through a deer and stuck in the dirt. He takes it from dull to wicked sharp in almost no time.