7 Steps to Becoming a Better Bow Shot

Looking to be a better bow shot before the fall hunting season? Then you need a sound routine — and the time to start is now!

7 Steps to Becoming a Better Bow Shot

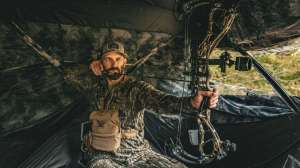
Few things are as exciting in the world of bowhunting as witnessing a well-orchestrated plan come together. Weeks of planning, untold time scouting and countless hours slinking through the autumn woods in hopes of creating that one defining moment when a razor-tipped arrow is finally released at fur and bone is exhilarating. Getting that one opportunity, that one chance when all the hard work comes together, is the pinnacle.

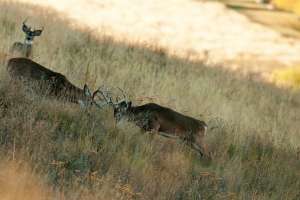
Nearly two decades ago, that pinnacle was feeding toward an opening just 43-yards away, and as each second passed, my heart thumped with anticipation. By Colorado standards he was not a monster muley, but for a bowhunter bearing down on his first muley buck, his bread-n-butter velvety 4x4 rack easily met my rookie standards. 

I had located this buck and his 3x3 companion before they bedded on a brush-choked bench earlier that morning. After spending the next couple hours dissecting their choice bedding area with my 10X42s and waiting for the capricious mountain breeze to stabilize, I determined that they were in a perfect spot for a willing bowhunter to sneak from above. 

Everything was going as planned; the wind was staying true and the nearby creek offered just enough noise to muffle any missteps. The screen of brush was high enough to hide my movements and the bucks were still snoozing, unaware of my intentions. All I had to do was seep a few yards closer and wait for them to make the next move. 

As if on cue, both bucks stood and began feeding toward the opening. As their racks bobbed above the brush, I knew a shot was imminent and nervously prepared for the release. The 3x3 eased through the opening first, and even though I was at full-draw, my greed for bone kept the arrow on the string. From my crouched position, I held for more-than-a-minute waiting on his larger companion to appear, and when he did my 40-yard pin floated wildly across his chest. Partially exhaling one last breath, I steadied the pin and released.

Before the arrow hit its mark, I knew the shot was off, and my high anticipation of the release quickly turned as fast as the buck disappeared over the ridge. Although I had bowhunted for only a few years at that point, and had killed a couple quality animals, I knew that I had made a rookie mistake the moment I released the arrow. My only hope was that my cut-on-contact broadhead did enough damage to the gut shot buck that he would die by day’s end. 

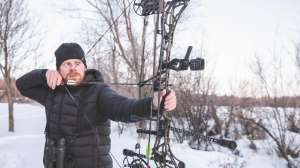
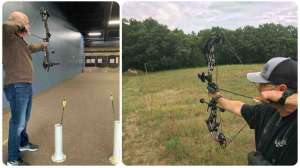
The shot is perhaps the most critical aspect to a successful fall regardless of the weapon of choice. Time and time again I hear about hunters who pick their bows up for the first time a few weeks before the season, sling a few dozen arrows to make sure everything is “still dialed-in” and then head to the woods. Ashamedly, I have acted is this regard on a few occasions myself and it has cost me nearly every time.

Find the Correct Draw Length

As bowhunters, there are many things in our control that we can use to enhance our success: scout more, learn to read sign, have a better understanding of animal behavior, plan better, be an overall better woodsman and the list goes on. However, without question the road to consistent success is making the shot, regardless of the situation. Putting a little time and effort behind the bow before the season and making a few tweaks along the way in the process will give you the confidence to hit the 10-ring when the opportunity arises.

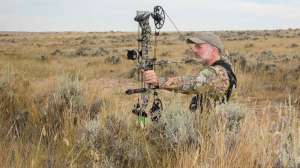
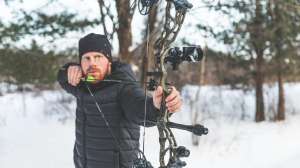
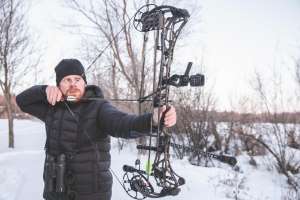
Besides a regimented practice plan before the season, one of the first things bowhunters can do to improve their accuracy, in many cases, is to shorten their draw length by a half-inch. In today’s near manic need-for-speed mentality, many bowhunters unknowingly are overdrawing their bows in an effort to enhance their power stroke. Even though slightly more arrow speed is achieved, it really is negligible compared to the accuracy lost.

One of the first things I did to improve my accuracy was shorten my draw length from 32 to 31 inches. One of the biggest advantages I learned in doing this was the ability to hit the back-wall with every shot cycle, regardless of the shooting position I found myself in. Most shots in hunting situations are not ideal, especially in stressful situations. A slightly shorter draw is not only easier to hold at full draw for longer periods, but it also allows the hunter to shoot more consistently at steep angles or while dealing with torqued body positions. Slack can develop on the bowstring when the back-wall isn’t engaged, which alters the arrow’s position, flight and overall accuracy. At the end of the day, arrow speed should not trump accuracy, and with today’s fast bows there is really no need to seek more speed.

A regimented practice plan puts the onus on the bowhunter to constantly improve his or her accuracy skills.

Contacting the Bow

Having consistent contact points shot after shot is also critical, and the grip is at the top of that list, with the release aid and where the string contacts your face to follow. Ideally, the grip should not only be comfortable and feel natural in the hand but also be a torque-free contact point, which allows the shooter to feel relaxed. The grip itself should be relatively narrow and on some bows the grip-plate may need to be removed to achieve this. It should also be comfortably placed just inside the lifeline of your hand with the fingers loosely hanging just off the bow.

The release aid on the D-Loop and the string contacting the face should also be consistent. To eliminate unwanted torque, the release aid should be relaxed and you should be able to draw a straight line between the release contact point to your elbow. You should also feel relatively relaxed at full draw. If you’re not, you might need to shorten your draw length as mentioned previously. As for the string contact point on your face, it should only lightly touch your face and be more of a consistent reference point than anything else.  

Also, for bowhunters to develop pin-point accuracy it is not the quantity of time spent at the range that matters, but the quality of time that can really make the difference. Typically, bowhunters aren’t competition shooters and don’t need to release thousands of arrows a year to become deadly. However, once a bowhunter develops consistent form and finds the perfect back-wall sweet spot, spending time at the range shooting longer distances significantly improves overall accuracy. For whitetail hunters this could mean spending time shooting out to 40 to 50 yards consistently, and for the western hunter practicing out to 60, 70 and even 80 yards is a must. Even though you may not ethically shoot an animal at those distances, being more accurate at longer distances reduces the margin for error at those slam-dunk ranges. 

Don’t forget to practice at close distances as well, even those 5-yard so-called chip shots. Knowing what your bow does in virtually every shooting situation is critical. It wasn’t too long ago that I rattled a Kansas heavyweight 10-point into range. In a matter of seconds his bulky body was mere steps from the base of my stand before I had a shot. Burying what I thought was the right pin into his chest, I released the arrow only to see it skip off the top of his back. Needless to say, I was disappointed by the result but have not made that mistake since.

By following the seven-step shooting routine detailed below, you'll improve your accuracy on everything from 3-D targets to live animals.

Challenge Yourself to be Consistent

It’s also good to compete in a few 3-D tournaments during the off season. Besides being fun and a great opportunity to meet other hunters in your area, tournaments typically offer situational shots you will face in the woods. Hitting the 10-ring from standing, sitting, kneeling, steep angles and around obstacles not only builds confidence in your ability, but it’s also an excellent time to learn how you respond both physically and mentally to these stressful situations.

Lastly, to improve your accuracy when it really counts, you should develop a shooting process that is the same every time, regardless of the situation. Not only does this help reduce potential target panic for many bowhunters, as well as to improve the mental aspect of making the shot, but it also develops a routine. Having a sound routine is crucial! A process should consist of the following seven steps:

  1. Having a consistent grip.
  2. Visualizing the shot.
  3. Smoothly drawing to a consistent and solid anchor point.
  4. Float the sight pin on the kill zone.
  5. Focus on the specific spot you want the arrow to go, not on the pin.
  6. Have a surprise release.
  7. Follow-through, keeping the sight picture until the arrow hits the target. 

After a few agonizing hours at camp replaying my poor shot over-and-over again, wishing I had spent a lot more time before the season shooting my bow and understanding how to become a more effective bowhunter, I took up the track of the muley buck. The blood trail was sparse to say the least, but I did manage to find a speck here and a hoof print there. After nearly an hour of tracking, in many cases on my hands and knees, I ultimately located my fallen Colorado prize. Needless to say, I was relieved with the result and it ultimately made me a better bowhunter.


Discussion

Comments on this site are submitted by users and are not endorsed by nor do they reflect the views or opinions of COLE Publishing, Inc. Comments are moderated before being posted.