Skinning, cleaning and boning a fresh-killed deer on your own has evolved into kind of a rural art form in recent years. Today, with whitetail populations at record-high levels and hunters collecting more deer than ever before, many sportsmen have learned that processing a deer for the grill or freezer is no big deal.
In fact, my mother, Phyllis, could clean a buck with the best of ’em, which sometimes made for humorous moments around city folks. When cocktail party patrons in Chicago (where she lived, though she was raised in rural North Carolina) heard she cleaned deer, their eyebrows would rise, questioning her skills. But she’d look ’em right in the eye, and say with authority, “Cleaning a buck is just like cleaning a big rabbit — ’cept the meat’s heavier.”
Today a lot of deer hunters take great pride in doing it all afield, from leasing land, to scouting it, placing stands, making deadly shots, recovering game, and processing venison exactly the way they want it. In a primitive sort of way, some hunters actually find it kind of enjoyable.
Not only are deer cut into portions the way a hunter prefers, but an animal also is cleaned quicker and cooled faster. In regions where the closest commercial butcher is a long drive away, on-your-own processing is the most practical way of dealing with harvested game.
Moreover, during the height of the season in a good deer camp with 20 or 30 hunters, it’s not unusual to have a dozen or more deer hanging by the end of a weekend. Lugging all that venison to a processor is a time-consuming and expensive chore. So do it yourself —it’s not difficult and even can be done quickly to provide meat for dinner the night of a successful hunt.
I’ve seen guys who could skin and quarter a deer in under eight minutes, and I’ve viewed video clips of pros doing it in less than three minutes. My son and I can do a whole deer, working together, in about 30 minutes, because for us this is no race. In fact, there’s a special satisfaction in cleaning and boning a deer on your own — as it harkens back to old rural ways when a man was measured much by his self-reliance.
Here, then, is a simple step-by-step method of boning a deer.
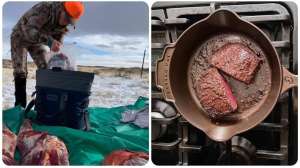
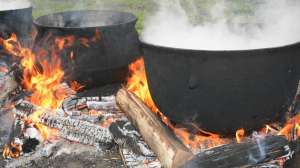
1) First have a “cleaning station” established where a deer can be brought back to a camp-like area with good light, a hose and other gear available for skinning and boning the animal.
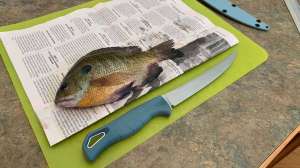
2) Once at the cleaning area, hang the deer by its hind feet on a gambrel, skin the animal, and remove the head and forelegs with a skinning knife and saw. There is no need to remove the viscera. Now, with a sharp fish fillet knife, trim all fat away from the carcass and discard. Be meticulous to trim along the backbone and hams, where much fat accumulates.
3) The next step is removing the two shoulders from the carcass. A shoulder is “free floating,” meaning the shoulder bone and blade are not attached by bone to the main body of the animal. Thus they are easily trimmed away from the carcass with a sharp, thin-blade fillet knife. To do this, simply stand facing the belly of the animal, grab one foreleg, and pull it out slightly away from the carcass while making quick vertical cuts with the knife between the leg and body. The shoulder blade extends a foot or so toward the rear of the deer, and this should come off in one complete piece with the foreleg. Repeat on the other foreleg, and when cutting, avoid tissue that was damaged or bloodied by the bullet or arrow. Such tissue should be discarded. Store both entire forelegs (as well as other meat to follow) in a large cooler with abundant ice. Trimming the forelegs of fat and sinew can be done later in a kitchen-like setting. Leg meat around the shoulder blade is very tender and is good when boned for marinating and grilling. Most other foreleg meat is best for grinding, stews and jerky.
4) The primary backstraps (there are two) are next, and it helps greatly to have a second person stand on the belly side of the hanging carcass and simply hold it firmly. This keeps the animal from “spinning” and allows boning to go more quickly and safely.
Begin a backstrap cut with a fillet knife by inserting the blade close to the backbone, and severing the loin away from the ribcage. Make slow, well-defined vertical cuts along the entire length of the backstrap, from the ham to the base of the carcass neck. As deeper cuts are made, the base of the ribcage is exposed and the loins almost peel away as cuts are made along the backstrap length.
Make a deep horizontal cut at the top of the backstrap near the ham, and a second horizontal cut at the bottom of the backstrap near the neck. Work slowly and carefully with the fillet knife, and the ’strap is easily removed in one large piece. Repeat on the opposite side of the backbone to remove the second. Trim fat and sinew carefully later.
5) Next are the hams, and to aid in removal of meat, it might be necessary to lower the carcass a bit with the winch. The sirloin tips come off first, and they are easily removed with a fillet knife. Stand on the belly side of the carcass, and locate what would be a “knee” of the deer. Just below the “knee” on the ham, hold the fillet knife horizontal to the leg, and make a deep cut. With the knife blade you’ll feel bone, which is the femur. The knife blade is positioned tight to this bone and across it, while cutting away a large meaty muscle portion that is essentially the sirloin tip. It makes a great single roast, or later can be cut into steaks, or chunks for stews and roasts.
6) Boning the rest of the hams is next, and it can be done so that they come off in very large sections for big roasts, steaks, or in smaller chunks used for stews, frying, grilling, grinding, etc. Work your fillet knife close to the big ham bone and pelvic area. Small chunks of the good-eating ham should be trimmed away and saved, too, as they are outstanding for marinating and grilling, grinding as hamburger or sliced for jerky.
7) Neck meat, flank meat and any other small “pieces” still remaining on the carcass easily can be trimmed off now, since they are excellent for use as ground venison, sausage and jerky.
8) The tenderloins — or secondary or “inside” backstraps — are next, and they can be removed easily, without much mess. Turn the carcass so you’re facing the belly side, and while using just the very tip of a fillet knife, pierce the belly skin below the pelvis. Be careful not to pierce the stomach or bladder. Simply cut the thin belly meat downward, so that the stomach “rolls” out slightly, away from the carcass.
The belly skin only needs to be sliced about a foot or so, just enough that the stomach pulls away from the carcass and backbone, so you can then remove the inside tenderloins.
These meat pieces are about 10 to 12 inches in length, and only a couple inches in diameter, but are very tender and succulent. Feel for them first, as they are on either side of the backbone, and then delicately remove them with a fillet knife. Done correctly, it’s a clean, fast operation, without stomach contents or bladder pierced, and no blood from inside the carcass cavity is disturbed.
9) Allowing meat to “age” in a cooler with plenty of ice for several days is great and makes venison tender. Storing meat in a refrigerator or food locker for several days is also excellent. Some people believe venison should not be allowed to soak in ice water. But this helps remove blood when the cooler is drained periodically, and I’ve never had a problem with meat on ice being tough or distasteful — in fact I find it perfectly great to eat when handled this way.
10) Trimming venison — removing all fat and sinew — for freezing or cooking is important. For freezing, cut portions into sizes needed for family meals, and mark packaging with a felt pen as to type of cut, how many people it will feed, and the date.
A vacuum sealer with quality heavy-duty bags does an outstanding job for freezing venison for up to two years. Wrapping venison in heavy freezer paper works, too, but be careful not to skimp on paper or tape.